Benefits of Using Whiteboard Projector Whiteboard Wallpaper
Easy Installation, Versatile Functionality
Projector Whiteboard Wallpaper from Smarter surfaces transforms any flat surfaces like a wall into writable and projectable areas. Create inspiring writable and projection surfaces that encourage collaboration.Boost Creativity and Productivity
Show presentations, images, and videos directly on the surface and write over them for enhanced collaboration and focus. Compatible with all projectors, it's perfect for offices, classrooms, and meeting rooms.Innovate Collaborative Environment
Convert any smooth surface into a writable and projectable area, fostering efficiency and creativity. Write and project directly onto the surface for seamless interaction.Optimized for Natural Light and Guaranteed Performance
Low sheen finish reduces glare, ensuring optimal readability. Guaranteed durability for 10 years with stain-resistant, non-ghosting surface.Environmentally Friendly
VOC-free, solvent-free, and isocyanate-free, it can be applied safely in the presence of people.Projector Whiteboard Wallpaper - Technical Specifications
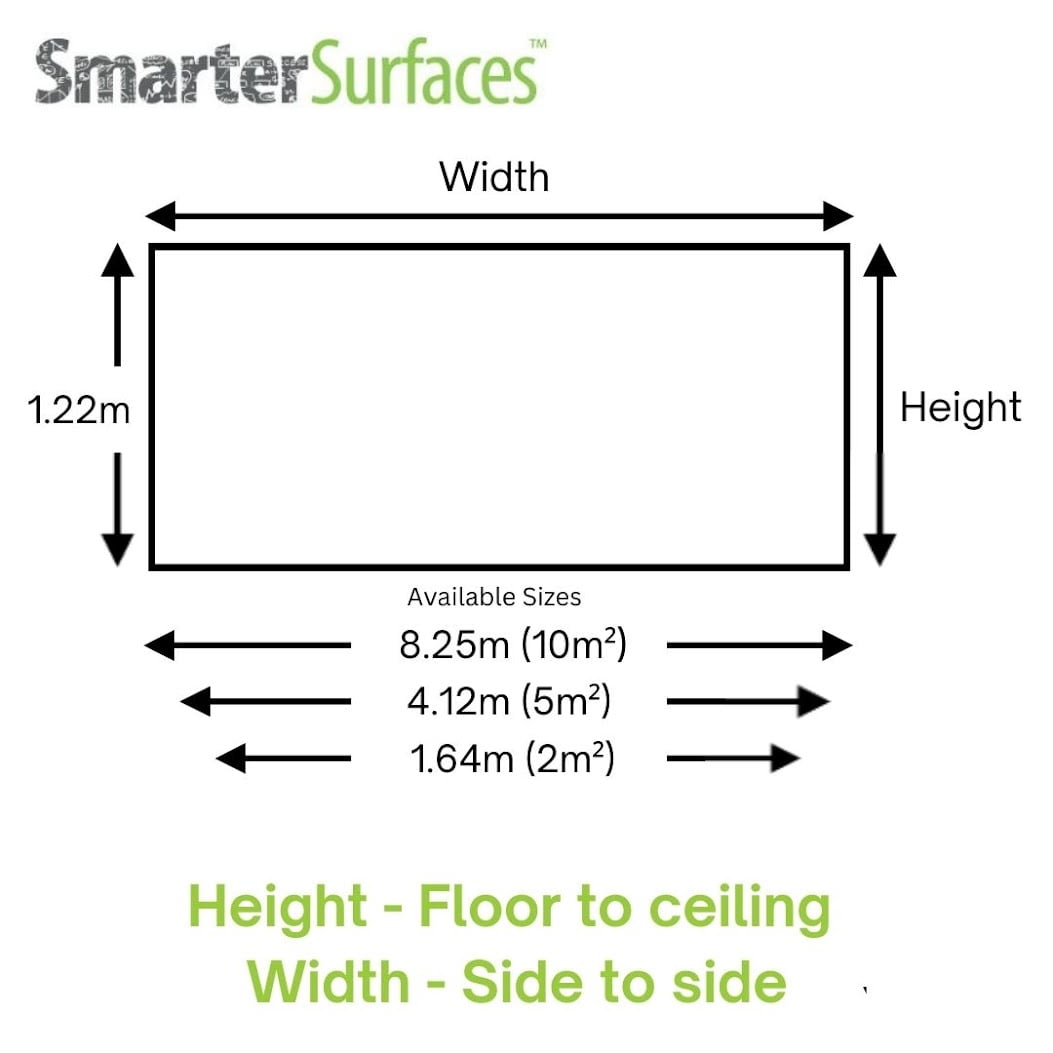
Coverage / Dimensions:
- 10m² / 1.22m x 8.25m
- 5m² / 1.22m x 4.12m
- 2m² / 1.22m x 1.64m
Product Color: White (RAL: 9016)
Product Finish: Low Sheen
Gloss Measurement: 41 GU at 60 degrees
Gain Value: 1.1 at a viewing angle of 120 degrees
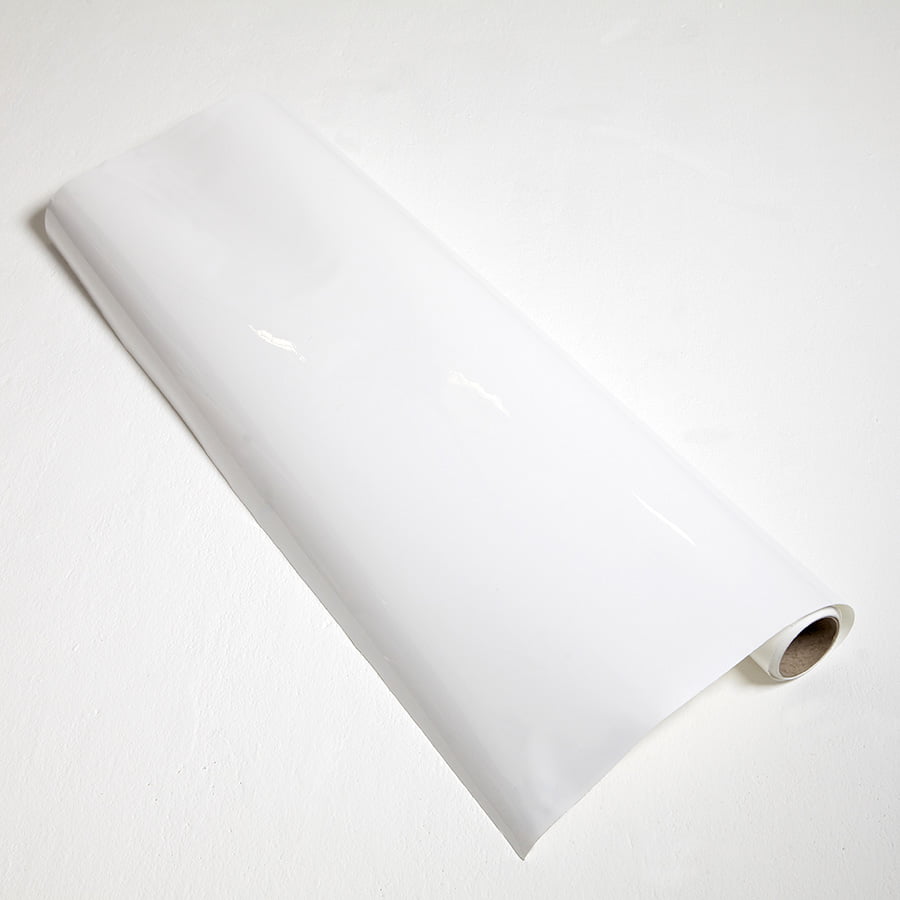
Material Thickness – 0.30mm
Lighting: Normal ambient lighting
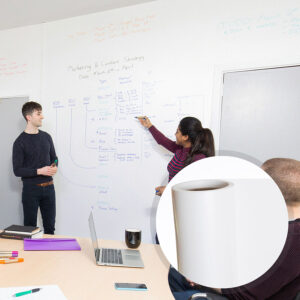
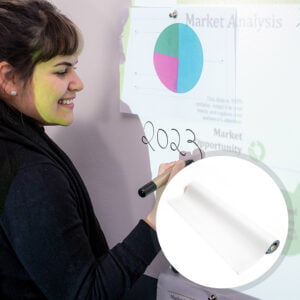
Performance: Dry Erase & projection with bright, sharp projection performance
Odour: None
Environmental (exceeds all UK standards): VOC free, solvent free, PFOA & PFOS free and isocyanates free
Certification: Independent certification for Fire
Suitable Surfaces: walls, plaster, concrete, wood, metal, doors or any smooth surface
Built with over a decade of expertise in whiteboard and projection surface technology.
Not certain which product is right for you? Our team provides comprehensive support through video calls, live chat, phone, and email. Take advantage of free technical advice, suggestions, and tailored product recommendations to ensure you select the ideal solution for your needs. Concerned about installation? We are available to guide and assist you every step of the way.
Kit Contents
10m² & 5m²
- 1 x Dry Erase Projection Wallcovering
- 1 x Surface Sticker
- 1 x Application Guide
- 1 x Wallpaper Spatula
- 1 x Pair of gloves
- 1 x Microfibre Eraser
2m²
- 1 x Dry Erase Wallpaper
- 1 x Microfibre Eraser Cloth
- 2 x Adhesive Tubes
- 1 x Application Guide
Projector Whiteboard Wallpaper Reviews
R Hislop - Staten Island Fitout LLC
Thomas Jefferson High - Fairfax County
Lead Architect - SBJ Design Group
You may also like…
Magnetic Whiteboard Wallpaper
£188.00 – £666.00Price range: £188.00 through £666.00 ex.VAT Select options This product has multiple variants. The options may be chosen on the product pageProjection Screen Whiteboard Self-Adhesive Film
£89.00 – £270.00Price range: £89.00 through £270.00 ex.VAT Select options This product has multiple variants. The options may be chosen on the product pageWhiteboard Wallpaper
£116.00 – £396.00Price range: £116.00 through £396.00 ex.VAT Select options This product has multiple variants. The options may be chosen on the product pageMagnetic Projector Screen Whiteboard Wallpaper
£224.00 – £710.00Price range: £224.00 through £710.00 ex.VAT Select options This product has multiple variants. The options may be chosen on the product page
FAQ's
It indicates the quantity of reflecting lumens that the screen can deliver. An increased gain value indicates that a greater amount of light is reflected, producing a more luminous image on the display. A reduced gain value indicates diminished light reflection, leading to a darker picture.
The gain value of a screen also affects the breadth of the viewing angle. A screen with increased gain will have a narrower viewing angle, necessitating that viewers be positioned more directly in front to attain optimal brightness. A screen with reduced gain will have an expanded viewing angle, enabling observers to perceive a brighter picture even when positioned off-axis.
The gain selection relies on the particular viewing environment and the intended viewing experience. Elements like ambient light, screen dimensions, projector luminosity, and audience seating configuration all influence the ideal gain for a certain scenario.
Next, proceed to position the wallpaper in the same manner as traditional wallpaper. Utilize a flat plastic edge to push out any air bubbles and trim to size with a sharp knife.
You can add more rolls to cover an entire wall by simply pushing two or more rolls together along the edge.
See our projection whiteboard wallpaper application video
How is Projector Wallpaper applied?

It also has independent certification for Fire Class A and Projection Performance Report – CREST.
For more cleaning, the use of any standard Whiteboard Cleaning Spray is recommended.
In cases of tough or stubborn marks, it is advisable to utilize a specialized Permanent Ink Remover for best results.
To ensure optimal cleaning results while preserving the surface quality, we recommend utilizing our specially formulated cleaning fluids, which are designed specifically for smart surfaces.
For further information, please refer to our complete range of cleaning products.
If permanent markers are used by mistake, we recommend employing our Permanent Ink Remover to effectively eliminate the markings.
If this method proves ineffective, we advise using our Permanent Ink Remover available on our online store.
This specialized cleaning product is specifically formulated to eliminate permanent marker stains, and ghosting on whiteboards and Whiteboard Wallpaper - Low Sheen surfaces.
Please note: Smart Whiteboard Wallpapers can be used with short throw interactive projectors
For a surface that combines both projector and whiteboard functionalities, we recommend our Projector Whiteboard Wallpaper - Low Sheen
For high-performance projection consider our range of specialist projection paints.
Projector Whiteboard Wallpaper installation
Projector Whiteboard Wallpaper is a convenient and ready-to-use writable whiteboard and projector screen wallcovering that can be applied effortlessly, and it will be ready for use within 48 hours. This versatile wallpaper can be hung horizontally, vertically, and even on curved rounded walls, although horizontal hanging is recommended for ease of use at eye level.
Begin by ensuring the surface is well-prepared. Fill any cracks or holes and sand the area until it is smooth. If necessary, apply a coat of primer to create a base. Measure the wallpaper to the required dimensions and cut it accurately using sharp scissors. For convenience, unroll the material on a clean and flat surface for cutting.
Apply two coats of adhesive to the wall using a roller. Allow the first coat to dry before applying the second coat. Once the adhesive is ready, install the whiteboard wallpaper. Use the provided spatula or a smooth plastic edge to eliminate air bubbles and remove excess adhesive, ensuring a smooth finish. Finally, clean the entire surface with water and a cloth to complete the process.
For a comprehensive application guide, refer to the detailed instructions provided to apply the projector whiteboard wall covering.
You can also watch our whiteboard wallpaper application video for a visual demonstration.
If you wish to evaluate our products’ performance, request a sample pack.
For further assistance or inquiries, our dedicated customer service team is available to help. Feel free to contact us for personalized support
A full application guide to help you apply our Projector Whiteboard Wallpaper.
Projector Whiteboard Wallpaper installation Video
Watch our step-by-step Video Application Guide
Projector Whiteboard Wallpaper Videos
Creative Professional Teaching Methodology | Upgrade The Learning Experience | Smarter Surfaces