Modern Living Room Designs with Black Projection Paint: Insights for Architects and Designers
- Introduction
- Why Black Projection Paint Matters in Modern Living Rooms
- Benefits of Black Projector Screen Paint for Architects and Designers
- Black vs White Projector Screen Paint: Which is Right for You?
- Modern Living Room Projector Ideas with Black Projection Paint
- Smarter Surfaces Black Projection Screen Paint
- How to Design a Living Room with Black Projection Paint
- Final Words
- FAQs
In 2025, living rooms are no longer static spaces; they are multifunctional environments shaped by hybrid lifestyles. From work and study to entertainment and relaxation, these rooms demand flexible design solutions that deliver both style and utility. For architects and interior designers, the challenge lies in finding products that strike a balance between aesthetics and performance.
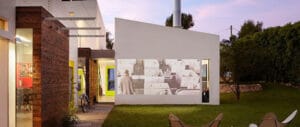
One of the most innovative tools available today is black projection paint. This cutting-edge solution enables any smooth surface to function as a high-quality projector screen while blending seamlessly with modern interiors great where there can be higher levels of ambient light. When used strategically, black projector screen paint for architects and designers opens new possibilities in living room entertainment design, home cinema wall paint, and modern living room projector ideas.
This blog explores how Smarter Surfaces Black Projection Screen Paint can elevate living rooms for your clients, comparing it with traditional white screens, and highlighting its role in future-ready interiors.
Why Black Projection Paint Matters in Modern Living Rooms
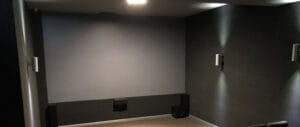
Transform Any Space into a Projection Surface
With black projection paint for interior designers, you can revolutionise how living rooms are planned. Instead of bulky projector screens or fixed boards, any smooth wall, whether drywall, plaster, wood, or even concrete, can become a living room projector screen paint surface.
This approach saves space, maintains clean design lines, and ensures the room remains multifunctional. For small apartments or compact layouts, black projection paint for small living rooms is especially effective, allowing designers to deliver immersive cinema like entertainment experience without sacrificing valuable floor space.
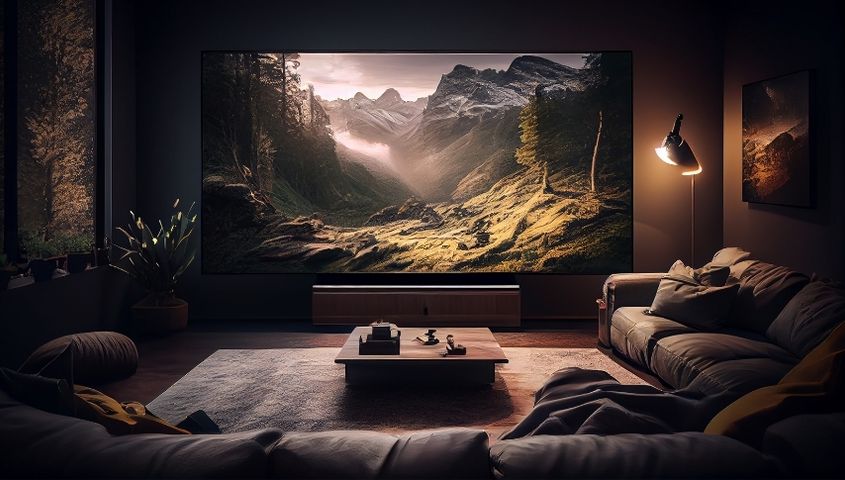
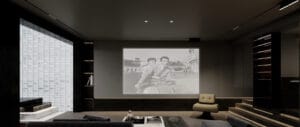
Deliver a Cinematic Experience at Home
Clients increasingly want a home cinema experience within their living spaces. Unlike standard walls or white screens, black projector paint enhances image quality by improving contrast and depth. Dark blacks appear richer, colours more vibrant, and details sharper, creating an immersive movie room paint idea that resonates with modern lifestyle expectations.
For architects and interior designers, suggesting black projector screen paint communicates innovation, expertise, and a commitment to premium living room design solutions.
Benefits of Black Projector Screen Paint for Architects and Designers

Enhanced Visual Performance
The benefits of black projector screen paint include superior contrast ratios, deeper blacks, and minimised light spill. This makes it ideal for living room entertainment design in low-light or completely dark settings.
Space Efficiency
Unlike traditional projector screens, projection paint for living room interiors requires no storage, installation, or additional fittings. It is simply painted on, saving both physical space and design complexity.
Multifunctionality
A black projection wall can serve as a home theatre screen, a presentation surface for work-from-home professionals, or even an educational tool for children. This adaptability is a key selling point for modern living room designs with projection paint for architects.
Easy Maintenance
Smarter Surfaces projection paint for architects is user-friendly. Once applied, it requires minimal upkeep; a simple wipe with a microfiber cloth keeps it looking fresh. This aligns with client expectations for long-term, low-maintenance solutions.
Professional Value
For architects and designers, offering black projection paint for living rooms demonstrates forward-thinking design. It’s a cost-effective solution that merges technology, function, and style.
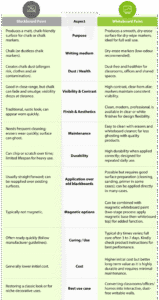
Black vs White Projector Screen Paint: Which is Right for You?
Choosing between black and white projector paints depends on lighting conditions and design goals. Here’s a professional comparison:
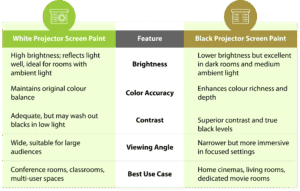
This black vs white projector screen paint debate ultimately comes down to room type and viewing preference. For living room projector screen paint applications, black is typically the best projector screen paint colour because it creates a cinematic atmosphere in low-light settings.
Modern Living Room Projector Ideas with Black Projection Paint
Architects and designers can utilise modern living room projector ideas to maximise value for clients:
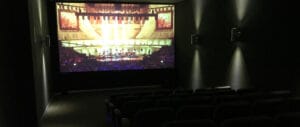
- Home Cinema Walls: Replace bulky projector screens with home cinema wall paint for a sleek, minimalist design.
- Dual-Purpose Living Rooms: Use projection paint for architects and designers to create walls that serve as both decorative elements and projection surfaces.
- Compact Spaces: In smaller apartments, black projection paint for small living rooms helps save space while still delivering high-quality visuals.
- Multi-Use Family Rooms: A wall painted with black projection paint for interior designers can host family movie nights, work presentations, or kids’ learning activities.
Smarter Surfaces Black Projection Screen Paint
Not all projector paints deliver the same performance. Smarter Surfaces Black Projector Screen Paint has been engineered to meet the highest standards for architects and designers. There are some key features as follows –
- Commercial-grade performance tested with leading brands like Sony, Epson, and Panasonic.
- Ultra-matte layering technology for sharper images and maximum pixel definition.
- 5-year warranty ensuring durability and client trust.
- DIY-friendly kit with all required tools for quick application.
- Fast turnaround, usable within 24 hours of application.
For architects seeking reliable solutions, Smarter Surfaces projection paint for architects is the best black paint for projector screens in 2025.
How to Design a Living Room with Black Projection Paint

When integrating projection paint into a design:
- Identify the projection wall, ideally opposite the main seating area.
- Ensure surface preparation, smooth, primed walls deliver the best projection quality.
- Plan lighting, use blackout curtains or dimmable lights for maximum effect.
- Incorporate furnishings, and choose minimalistic furniture to avoid obstructing the projection space.
- Add acoustics, pair projection paint with subtle soundproofing or surround sound design for a full living room entertainment design experience.
This approach helps architects deliver modern living room designs with black projection paint that combine function with high-end aesthetics.
Final Words
Modern living room designs with black projection paint represent the future of flexible, client-centred interior design. For architects and designers, integrating Smarter Surfaces Black Projection Screen Paint into projects means delivering cinematic-quality performance, space efficiency, and long-term value.
Whether it’s a home cinema wall paint solution, projection paint for living room interiors, or black projection paint for interior designers, this product ensures your clients receive the very best in both design and functionality.
Explore the full range of Smarter Surfaces projection paints to find tailored solutions for every interior project.