All You Need to Know About Projector Screen Paint

All You Need to Know About Projector Screen Paint

All You Need to Know About Projector Screen Paint

  1. Introduction
  2. What is Projector Screen Paint?
  3. What Are The Types of Projector Screen Paint?
  4. What Are The Features Of Projector Screen Paint?
  5. What Are The Benefits of Using Projector Screen Paint?
  6. What Is The Use Of Projector Screen Paint?
  7. Key Takeaway

Benefits of Projector Screen Paint for Walls

Benefits of Projector Screen

Projector screen paint is engineered to absorb as little light as possible and, crucially, to reflect light back in a controlled direction rather than scattering it everywhere. The result is that more light reaches your eyes instead of bouncing uselessly around the room, which translates directly to a brighter, more vivid image.

Think of it like the difference between shining a torch at a brick wall versus a road sign. The brick wall scatters light in all directions and looks fairly dull. The road sign sends light back towards you, appearing much brighter from your viewing position. Projector screen paint is similar to the road sign effect. 

Let’s read and understand about: what is projector screen paint, the types of projector screen paint, features of projector screen paint, and benefits of using projector screen paint.

What is Projector Screen Paint?

The answer to this question: What is Projector Screen Paint? is that, the paint has reflective properties designed to bounce light back to your eyes more effectively.

Standard white paint absorbs a bit of light and scatters it randomly. Projector screen paint contains tiny reflective particles (usually microscopic glass beads or similar materials) that redirect light back towards the viewer.

What Are The Types Of Projector Screen Paint?

Types Of Projector Screen Paint

Types Of Projector Screen Paint


There are various types of projector screen paint. There’s also a proper reasoning behind having this many options. Let’s learn about projector screen paint types.

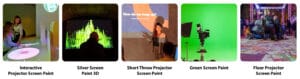
1. Ambient Light Rejecting Projector Screen Paint 

Ambient Light Rejecting Projector Screen Paint or ALR Screen Paint, tackles one of the biggest problems with home projectors – watching anything during the day. 

It’s designed to reject light from windows and ceiling fixtures while allowing the projector’s light to pass through. This means you can watch films without closing every curtain in the house. 

The technology uses specially angled particles that bounce projector light back to you but absorb ambient light from other directions. It is best suited for places with moderate light control.

2. Black Projector Screen Paint

Black Projector Paint for a projector screen is designed for situations where you cannot control ambient light, such as conference rooms or commercial spaces. 

The black surface absorbs stray light brilliantly, giving you genuinely deep blacks and impressive contrast. For this you’ll need minimum 2500 lumens from your projector to compensate for the light absorption. 

3. Clear Projector Screen Paint

Clear Projector Screen Paint has a clever technology that lets you turn windows or glass partitions into projection surfaces while maintaining transparency during the day. The paint works from either side, so you can project from inside for outdoor viewing or vice versa.

Ideal for classroom, office, gaming, and home theatre, it guarantees precise image projection and the best possible viewing experience in normal to low ambient lighting.

4. High Contrast Projector Screen Paint

High Contrast Projector Screen Paint is like a middle ground between standard white paint and extreme black options. 

This paint provides better blacks and more vibrant colours than basic projector paint. In contrast to ordinary material surfaces, it keeps performance steady throughout time and avoids hotspotting.

It also provides a better home theatre or gaming experience by enhancing contrast levels and keeping the screen black.

5. Outdoor Projector Screen Paint 

Standard projector paint deteriorates outdoors within months – moisture seeps in, UV light breaks down the reflective properties, and you’re left with a patchy disaster. 

The Outdoor Projector Screen Paint formula resists moisture, handles temperature fluctuations, and won’t fade in sunlight, making it suitable for painting on exterior walls, sheds, or purpose-built outdoor screens. 

It is designed to provide bright, sharp images day and night by optimising light return in both low and high ambient light settings. It is also adaptable to different projectors and offers a variety of projector options, such as normal, short throw, HD, 4K, interactive, and ultra-short throw projectors.

6. Interactive Projector Screen Paint

Interactive Projector Screen Paint works with interactive projectors – the ones that turn your projection surface into a giant touchscreen. The paint’s formulation allows the infrared sensors in interactive projectors to detect touch accurately, which standard projector paint doesn’t do reliably. 

The answer to the question, what is the use of Projector Screen Paint. Is that it is used in workplaces, meeting spaces, and classrooms where numerous people can regularly interact. 

7. Silver Screen Paint 3D

Silver Screen Paint delivers impressive brightness. Prevents projection hotspots for uniform image quality. Achieve ideal images free from hot spots and performance hiccups with Smarter Surfaces product. 

The paint helps to create 3D havens in places like galleries, museums, movie theatres, and home theatres. Powerful 3D equipment and low to medium ambient light levels are ideal for this paint.

8. Short Throw Projector Screen Paint

Short throw projectors are designed to create interactive projection surfaces that are perfect for collaborative and immersive learning environments. It is a great option for businesses, conference rooms, and classrooms with moderate to high ambient light levels because it works flawlessly with both short throw and ultra-short throw projectors. 

To ensure that the projected 3D images are shown with perfect accuracy and immersion, our Smarter Surfaces Short Throw Projector Screen Paint is specially designed to maintain light polarity.

9. Green Screen Paint

If you’re creating YouTube videos, streaming, or doing any sort of content creation, this paint solves the eternal green screen problem without the wrinkles and storage hassles of fabric. Simply paint a wall (or two walls if you want corner flexibility) with this properly calibrated green, and you’ve got a permanent chroma key backdrop ready whenever you need it. 

Holocrystalline crystals and organic coloured pigments are used in Smarter Surfaces Green Screen Paint to create a consistent matte finish that is sheen-free.

10. Floor Projector Screen Paint

Floor Projector Screen Paint turns floors into projection screens that can withstand foot traffic. The paint requires high-definition projectors for events, stores, and public spaces to captivate crowds. It is intended for projectors rated at least 2,500 lumens.

Bright, sharp, high-definition images are reflected by high-performance projectors in ambient light.

What are the Features of Projector Screen Paint?

Projector screen paint has technical features that differentiate it from ordinary paint: controlled reflectivity, colour neutrality, smooth finish, and varying degrees of ambient light management. 

Let’s learn about projector screen paint and talk what actually makes projector screen paint different from normal paint. 

1. Reflective Properties

The main features of projector screen paint and the reason projector paint exists – is how it handles light. Ordinary emulsion absorbs a fair amount of light your projector throws at it and scatters the rest randomly. Projector screen paint contains microscopic reflective particles (usually glass beads or similar materials) that bounce light back towards the viewer rather than dispersing it uselessly across the room.

The reflective coating means you’re getting more of the projector’s light output actually reaching your eyes. This means a more vivid image.

2. Gain Ratings

Gain ratings are a measurement of how much light the surface reflects compared to a standard reference white. A gain of 1.0 means it reflects light like standard white paint. A gain of 1.5 reflects 50% more light. 

Most decent projector paints sit somewhere between 0.9 and 1.2 gain, which provides improved brightness without creating viewing angle nightmares. Going higher than that requires understanding the trade-offs you’re accepting.

3. Colour Accuracy and Neutrality

Proper projector screen paint maintains colour neutrality. This means it doesn’t add its own colour cast to the projected image.

Professional projector paints are formulated to have a neutral colour temperature, which matches the standard for video content.

Grey and black projector paints are designed to maintain accurate colour reproduction while improving contrast. The grey absorbs ambient light without the colours your projector produces.

4. Smooth, Non-Textured Finish

Texture is the enemy of projected images. Any bumps, ridges, or rough patches on the wall will show up as imperfections in the picture.

Quality projector screen paint is formulated to create a smooth finish. Some products include levelling agents that help the paint settle evenly without visible brush or roller marks.

 5. Durability and Washability

Projector screen paint needs to last. You’re not repainting every couple of years like with ordinary walls. Smarter Surfaces quality projector paints are designed to be durable and cleanable without losing their reflective properties.

That means you can wipe off the inevitable fingerprints, dust, or mysterious marks that appear on walls without degrading the paint’s performance. 

6. Low VOC and Environmental Considerations

Smarter Surfaces safe and eco-friendly projector screen paints are low-VOC (volatile organic compounds) or zero-VOC. This means they don’t release nasty chemicals into your home as they dry. 

These paints are environment friendly with responsible formulations. This isn’t just better for the environment – it means you can actually use the room fairly quickly after painting without feeling like you’re huffing paint fumes.

7. Coverage and Application Requirements

Safe and eco-friendly projector screen paints often have different coverage rates than standard emulsion. Some products are quite thick and cover well in two coats. Others require three or even four coats to achieve the specified reflective properties.

The application method matters too. Some paints work fine with a standard roller, whilst others perform best when sprayed. A few are genuinely fussy about application technique.

8. Ambient Light Management

These features of projector screen paint vary depending on which type of projector paint you choose. 

  • Standard white paint doesn’t actively manage ambient light – it just reflects what hits it. 
  • Grey paint passively helps by absorbing some ambient light. 
  • ALR (ambient light rejecting) paint actively rejects off-axis light while accepting the projector’s light.

The effectiveness of ambient light management determines where you can realistically use the paint. Standard white paint needs proper darkness. Grey paint handles moderate ambient light reasonably well. ALR paint can cope with significantly brighter conditions, though it’s not magic – trying to watch in full daylight still won’t deliver great results.

Understanding how much ambient light management you need prevents disappointment.

9. Compatibility with Different Projector Types

When you learn about projector screen paints, you notice that most projector paints work with standard throw projectors, but some are specifically formulated for particular setups. 

Short throw projector paint, for instance, handles the acute angles that occur when the projector sits close to the wall. Interactive projector paint works with the infrared sensors that detect touch.

Standard projector paint won’t necessarily perform well with every projector type. If you’ve got a 4K HDR projector capable of high brightness, you want paint that can handle that without washing out. If you’re using an ultra-short throw projector, you need paint designed for the specific light angles involved.

Checking compatibility before committing to a particular paint prevents expensive mistakes.

What Are The Benefits of Using Projector Screen Paint?

Benefits of Using Projector Screen Paint?

Let’s talk about the actual benefits of using projector screen paint. Some of these are genuinely significant, while others matter more depending on your specific situation.

1. No Bulky Equipment

The most obvious benefits of using projector screen paint is visual simplicity. It has no massive frame dominating your wall, no bulky housing hanging from the ceiling, just a normal-looking wall when the projector’s off. 

This matters in living rooms or multipurpose spaces that need to function as regular rooms most of the time, rather than screaming “dedicated cinema” constantly. 

Your setup remains completely invisible until you actually fire up the projector, which keeps the room feeling like a proper living space rather than a tech showroom.

2. Cost Savings

Here’s where projector paint makes serious financial sense. A decent quality 100-inch pull-down screen costs £300-600. Quality projector screen paint covering the same area costs £100-250, including primer and supplies.

When you learn about projector screen paint, you know that savings become more dramatic as screen size increases. The paint to cover a large area costs essentially the same as covering 100 inches; you’re just painting a bigger section of wall.

3. Customisable Size and Shape

You’re not constrained by standard screen dimensions like 100″, 120″, or 135″. Paint exactly the size and aspect ratio that fits your wall perfectly, whether that’s 118 inches wide or an unusual cinemascope format.

This flexibility is particularly useful for awkward spaces with alcoves, architectural features, or non-standard proportions where finding a commercial screen in the right dimensions means expensive custom fabrication. Want to work around picture rails, fit an irregular wall, or create an unusually wide format? Just paint the exact shape you need.

4. Superior Ambient Light Performance

ALR projector paint handles ambient light better than standard white screens and often performs comparably to ALR fabric screens, costing several times more. The difference is particularly noticeable in living rooms or spaces where you can’t achieve complete darkness with maintained contrast and colour saturation. 

Grey and black formulas deliver contrast improvements that mid-range white screens simply can’t match, making viewing acceptable in conditions that would otherwise be hopeless.

5. Zero Maintenance and Nothing to Break

Projector screens have motors, springs, tensioning systems, and fabric – all components that eventually fail, requiring repairs or replacement. 

Paint just sits on your wall indefinitely with zero maintenance beyond occasional gentle cleaning, no mechanical parts to service, no fabric to replace, and no motors burning out after a few years. 

The reliability difference is genuinely significant when you consider friends’ expensive motorised screens developing issues whilst painted walls continue performing consistently year after year.

6. Easier Installation

Installing a large fixed-frame screen means mounting a weight perfectly level on your wall.

One of the most convenient benefits of using projector paint is its straightforward DIY skills. This includes filling, sanding, priming, and painting – without specialised tools, heavy lifting, or drilling multiple mounting holes. 

7. Perfect for Awkward Spaces

Some rooms don’t accommodate traditional screens well. Low ceilings make pull-down screens impractical. Irregular walls make fixed frames difficult. Architectural features get in the way. Paint works around these limitations because you’re working with the wall itself rather than mounting something to it.

The flexibility of simply painting whatever surface works for your space solves problems that would be genuinely difficult or impossible with conventional screens.

8. Improved Image Quality

With the right paint for your conditions, image quality often surpasses budget and mid-range screens. Grey paint delivers better contrast than standard white screens in rooms with ambient light. ALR paint outperforms non-ALR screens in bright conditions. High-contrast formulas rival expensive specialty screens.

The improvement is noticeable when moving from a basic white screen to grey or high-contrast paint in less-than-ideal lighting situations. Same projector, noticeably better blacks, more saturated colours, improved overall depth – genuine performance gains at lower cost. 

9. No Frame Shadows or Visual Distractions

A painted wall has no frame, no edges, no borders, casting shadows or reflecting light. The projected image appears to float on the wall without visual interruptions. This sounds like a minor detail, but many people find it better, which improves the viewing experience. You’re immersed in the image rather than constantly aware of the screen’s physical presence.

In properly dark rooms during atmospheric films, the lack of a visible frame creates a more cinematic experience. The image edges blend into darkness rather than being defined by a bright frame border.

10. Future-Proofing Your Setup

Paint offers flexibility in screen format. Simply repaint a different area in a new aspect ratio if preferences change, or adjust paint type if you upgrade to a brighter projector requiring different characteristics. 

If you move house, you’re not transporting massive screens; you just paint the new space. The flexibility means your projection surface can adapt as your needs evolve rather than being locked into decisions made years ago.

Ready to upgrade your experience? Shop Smarter Surfaces’ top-rated products today.

[siteorigin_widget class=”SiteOrigin_Widget_Image_Widget”][/siteorigin_widget]
[siteorigin_widget class=”SiteOrigin_Widget_Button_Widget”][/siteorigin_widget]
[siteorigin_widget class=”SiteOrigin_Widget_Image_Widget”][/siteorigin_widget]
[siteorigin_widget class=”SiteOrigin_Widget_Button_Widget”][/siteorigin_widget]
[siteorigin_widget class=”SiteOrigin_Widget_Image_Widget”][/siteorigin_widget]
[siteorigin_widget class=”SiteOrigin_Widget_Button_Widget”][/siteorigin_widget]

What is the Use of Projector Screen Paint?

Projector screen paint is useful when you want a permanent, integrated projection surface that doesn’t dominate your space with equipment. It’s valuable for dealing with ambient light, creating large-format displays without bulky hardware, or situations where traditional screens are impractical.

Below are some known spaces where projector paints are used. These spaces are the best use cases, but are not limited to your imagination.

  • Home Cinema
  • Garden Cinema
  • Business Presentations 
  • Schools and Interactive Learning
  • Content Creation

Key Takeaway

About Projector Screen Paint, it has come a long way from being a niche product to a practical solution for home cinema enthusiasts and professionals alike. Whether you’re dealing with awkward ambient light, limited space, or simply want a cleaner aesthetic than bulky screens provide, there’s paint that fits your situation. 

That said, it’s not a magic fix for every projection problem – you still need decent wall preparation, a capable projector, and realistic expectations about what paint can achieve. The key is matching the right type of paint to your specific circumstances. Grey paint for moderate ambient light, ALR for trickier conditions, standard white for properly dark rooms – each has its place. 

Projector screen paint delivers results that genuinely rival traditional screens at a fraction of the amount and often the cost.

[siteorigin_widget class=”WP_Widget_Custom_HTML”][/siteorigin_widget]
How to Restore Whiteboard Surfaces – A DIY Guide

How to Restore Whiteboard Surfaces – A DIY Guide

How to Restore Whiteboard Surfaces

  1. Introduction
  2. Why Whiteboards Deteriorate Over Time
  3. Check Before You Restore: Common Cleaning Mistakes
  4. Method 1: Restore Whiteboard with Whiteboard Paint
  5. Method 2: Restore Whiteboard with Self-Adhesive Whiteboard Film
  6. Maintaining Restored Whiteboards for Long Life
  7. Go Beyond Restoration: Add More Functionality
  8. Try Writable Walls Instead of Whiteboards
  9. Final Thoughts

Whiteboards are essential tools in classrooms, offices, and collaborative spaces, providing a clean, efficient, and interactive surface for writing, planning, and communicating ideas. Over time, even the highest-quality whiteboards can lose their ink resistance, brightness, and effectiveness. Frequent use, improper cleaning or use of chemicals and exposure to ink residue can cause stains, ghosting, scratches, and fading. This diminishes usability and makes the writing surface appear old and worn out

Replacing whiteboards can be costly, particularly for schools, offices, or institutions with multiple boards with high usage. Thankfully, there are effective methods to restore old whiteboard or even enhance their functionality, extending their lifespan and improving performance. With simple DIY techniques, you can rejuvenate a worn whiteboard, save costs, and reduce waste. 

This guide will walk you through step-by-step DIY whiteboard restoration methods, common mistakes to avoid, maintenance tips, and opportunities to upgrade surfaces with additional features like magnetism or projection capabilities. Using Smarter Surfaces UK products, these tasks become accessible, efficient, and professional.

Why Whiteboards Deteriorate Over Time

Why Whiteboards Deteriorate Over Time

Even the highest-quality whiteboards degrade over time due to everyday wear and tear. Marker residue buildup, for example, can create stubborn ghosting that is difficult to remove. Using low-quality markers or permanent pens can leave permanent stains, while frequent cleaning with inappropriate cloths or tissues may spread ink rather than remove it. 

Physical damage, such as scratches from sharp objects or abrasive cleaning or harsh checmicals further reduces the smoothness of the writing surface. Environmental factors such as sunlight, humidity, and temperature fluctuations can also contribute to fading and surface degradation. Understanding these causes is essential to choosing the right restoration method and ensuring that any whiteboard refurbishment delivers long-lasting results.

Check Before You Restore: Common Cleaning Mistakes

 Common Cleaning Mistakes

Before investing in restoration, it’s important to verify that poor performance isn’t simply the result of cleaning errors. Many whiteboards appear worn when, in fact, old ink residue is the main culprit. Using tissues or standard cloths can leave a fine layer of ink that dries into an almost invisible film that causes staining and ghosting marks. 

Similarly, some cleaners dissolve ink but do not lift it properly from the surface, creating a thin film. The easiest way to determine whether restoration is necessary is to clean the board using a microfibre cloth and a professional-grade whiteboard cleaner like Pro Cleaner. If the board still appears stained or scratched, it is time for more extensive refurbishment.

A simple homemade solution for ink residue combines two tablespoons each of white vinegar, lemon juice, milk, and Borax. Applied with a microfibre cloth, this mixture can remove stubborn stains effectively, providing an initial, cost-effective cleaning option.

Method 1: Restore Whiteboard with Whiteboard Paint

 Restore Whiteboard with Whiteboard Paint

There are a number of product options available to restore an old whiteboard surfaces the first one we will discuss us whiteboard paint then we will discuss self adhesive whiteboard film and so on. For whiteboards that remain stained, scratched, or dull even after proper cleaning, whiteboard paint restoration is an effective option. This method allows you to create a smooth, best performance writing surface.

Step-by-Step Process:

  1. Prepare the surface: Ensure the board is clean, smooth, and free from cracks or peeling areas. Fill holes or imperfections with a decorator’s filler. Sand the surface to remove bumps or inconsistencies.
  2. Prime the board: Apply one coat of high-quality primer. Wait for it to dry completely before applying a second coat. Additional coats may be needed for heavily stained boards. Sand lightly between coats to achieve a smooth base.
  3. Mix the paint: Smarter Surfaces Whiteboard Paint comes in two parts, Part A (transparent solution) and Part B (white pigment). Combine and stir thoroughly for at least five minutes.
  4. Apply paint: Use a fresh roller sleeve and divide the board into manageable sections (about 1 square metre each). Check for consistency and smooth coverage.
  5. Drying and curing: The paint becomes touch-dry in about 4 hours and reaches full functionality in 4 days. After curing, the board is ready for dry-erase markers and regular use.

Smarter Surfaces Whiteboard Paint provides a long-term, cost-effective solution to restore old boards, delivering a professional finish suitable for classrooms, offices, or homes.

Method 2: Restore Whiteboard with Self-Adhesive Whiteboard Film

Restore Whiteboard with Self-Adhesive Whiteboard Film

For quicker refurbishment, self-adhesive whiteboard film offers an easy, mess-free alternative. It transforms worn boards into smooth, writable surfaces without the need for painting.

Benefits of Whiteboard Film:

  • Simple application: Cut the film to the required size, peel the backing, and apply it to the surface.
  • Multiple finishes: Available in White Gloss, White Low Sheen, or Clear. White variants are ideal for restoring stained boards, while low sheen is suitable for surfaces used with projectors.
  • Durable and reliable: Smarter Surfaces’ films come with a 5-year product guarantee.
  • Minimal downtime: Ready to use immediately after application, offering convenience for busy classrooms or offices.

This method is also ideal for DIY whiteboard restoration projects in offices or small spaces where paint application may be impractical.

Ready to upgrade your experience? Shop Smarter Surfaces’ top-rated products today.

[siteorigin_widget class=”SiteOrigin_Widget_Image_Widget”][/siteorigin_widget]
[siteorigin_widget class=”SiteOrigin_Widget_Button_Widget”][/siteorigin_widget]
[siteorigin_widget class=”SiteOrigin_Widget_Image_Widget”][/siteorigin_widget]
[siteorigin_widget class=”SiteOrigin_Widget_Button_Widget”][/siteorigin_widget]
[siteorigin_widget class=”SiteOrigin_Widget_Image_Widget”][/siteorigin_widget]
[siteorigin_widget class=”SiteOrigin_Widget_Button_Widget”][/siteorigin_widget]

Maintaining Restored Whiteboards for Long Life

Maintaining Restored Whiteboards for Long Life

Proper maintenance is key to extending the life of any restored whiteboard. Using high-quality dry-erase markers prevents staining, while microfibre cloths remove ink effectively without leaving residue. Regular cleaning with dedicated whiteboard cleaners prevents ghosting and maintains a smooth, bright surface. 

Permanent marker remover should also be kept on hand for occasional stains. Avoid abrasive materials that can scratch the board, and schedule periodic cleaning to ensure consistent performance. With routine care, a restored whiteboard can remain fully functional for many years.

Go Beyond Restoration: Add More Functionality

Go Beyond Restoration: Add More Functionality

Restoring a whiteboard is also an opportunity to enhance its capabilities:

  • Writable + Magnetic: Apply a few coats of Magnetic Paint before painting over with Whiteboard Paint. The board becomes magnetic, allowing you to pin notes, visuals, or lightweight objects.
  • Writable + Projectable: Use a low-sheen projector whiteboard film to create a surface suitable for presentations.
  • Writable + Magnetic + Projectable: Combine magnetic paint with low-sheen projector whiteboard films to create a multifunctional surface, ideal for classrooms, training rooms, or collaborative offices.

These upgrades transform traditional whiteboards into interactive and versatile communication hubs, making restored surfaces more valuable and engaging.

Try Writable Walls Instead of Whiteboards

Try Writable Walls Instead of Whiteboards

While restoring single whiteboards is effective, it still limits the writing area. Turning entire walls into writable surfaces removes this constraint. Writable walls offer a larger space for brainstorming, planning, and collaboration, enabling multiple users to interact simultaneously. They encourage creativity, boost teamwork, and can be customised with additional functionality, such as magnetic surfaces and projectable finishes.

Smarter Surfaces UK offers Whiteboard Wallpapers that are easy to install, seamless, and highly durable. The Magnetic Projector Screen Whiteboard Wallpaper combines writeable, magnetic, and projection capabilities into one solution, transforming classrooms and offices into interactive, multifunctional spaces. Writable walls are an excellent way to enhance collaboration while upgrading from traditional whiteboards.

Final Thoughts

Restoring whiteboard surfaces is a cost-effective, sustainable, and practical solution for institutions and offices. Whether using Smarter Surfaces Whiteboard Paint or Self-Adhesive Whiteboard Film, restoration improves usability, removes ghosting, and extends the life of existing boards.

By implementing proper maintenance techniques and considering advanced upgrades such as magnetism or projection compatibility, old whiteboards can be transformed into dynamic, interactive tools. For larger spaces, writable walls offer enhanced collaboration opportunities and flexibility, helping you modernise your learning or working environment without replacing existing infrastructure.

Smarter Surfaces provides professional support, detailed installation videos, and tailored product recommendations. Book a free consultation today to discuss restoration or upgrade options and discover how to maximise the potential of your whiteboards or walls.

[siteorigin_widget class=”WP_Widget_Custom_HTML”][/siteorigin_widget]
5 Top Benefits of Using Technology in the Classroom

5 Top Benefits of Using Technology in the Classroom

Benefits of Using Technology in the Classroom
  1. Introduction
  2. Benefit 1 - Improved Critical Thinking and Problem-Solving Skills
  3. Benefit 2 - Enhanced Communication and Collaboration
  4. Benefit 3 - Increased Access to Information and Resources
  5. Benefit 4 - Enhanced Student Engagement and Motivation
  6. Benefit 5 - Better Organisation and Time Management
  7. Creating Smarter Learning Environments
  8. Final Words

Benefits of Projector Screen Paint for Walls

    Technology has become an essential part of modern education, reshaping the way students learn and teachers deliver lessons. Across the UK, classrooms are evolving from traditional, paper-based environments into dynamic, interactive learning spaces. This shift is not simply about replacing chalkboards with screens; it’s about creating smarter learning environments that encourage collaboration, creativity, and critical thinking.

    Incorporating technology into teaching helps educators address diverse learning styles while promoting active participation and engagement. From digital collaboration platforms to interactive whiteboards, technology provides students with the tools to explore, analyse, and express classroom transformation ideas more effectively. In this blog, we’ll explore the top five benefits of using technology in the classroom, along with practical examples and tools to help teachers enhance learning outcomes and engagement.

    Benefit 1 - Improved Critical Thinking and Problem-Solving Skills

    Developing critical thinking and problem-solving skills is a key goal of modern education. By integrating technology into lesson plans, teachers can encourage students to engage with content more analytically and independently. Digital tools, from coding software to interactive simulations, encourage students to evaluate information, test ideas, and make decisions based on evidence.One effective teaching approach is Think-Pair-Share (TPS), a cooperative learning method that encourages students to think critically through three steps.Incorporating technology into this process can amplify learning. For instance, students might use tablets to research data, online classroom collaboration tools to share findings, and whiteboard walls to visually map their ideas. By doing so, they engage in higher-order thinking, analysing, interpreting, and applying information rather than simply recalling facts.]Educators can also use interactive whiteboard surfaces, such as Whiteboard Paint from Smarter Surfaces UK, to create an engaging environment that encourages brainstorming and participation. Unlike standard boards, these writable surfaces transform entire walls into creative learning spaces, allowing students to explore concepts visually and collaboratively.]This approach helps students develop essential 21st-century skills, analytical reasoning, creativity, and teamwork, while making learning more immersive and meaningful.

    Benefit 2 - Enhanced Communication and Collaboration

    Effective communication and collaboration are fundamental to both academic and professional success. Technology makes it easier for students and teachers to connect, share ideas, and work together, whether they are in the same classroom or learning remotely.Modern classrooms increasingly rely on collaboration tools such as Google Workspace, Microsoft Teams, and Trello to facilitate teamwork. These platforms allow students to co-edit documents, plan group projects, and communicate instantly, breaking down traditional barriers to learning.Beyond digital platforms, physical classroom tools also play a vital role in improving collaboration. Writable and magnetic surfaces, like Magnetic Whiteboard Paint, allow students to brainstorm ideas collectively, present solutions, and visualise concepts in real time. This not only supports creativity but also mirrors how teams collaborate in professional settings.Additionally, these interactive tools promote inclusivity. Students with different communication preferences or learning needs can contribute equally, whether through digital notes or visual diagrams on the wall. Such integration of education technology tools helps educators create flexible and accessible environments for all learners.In essence, technology enhances both collaboration and connection, boosting a sense of community that motivates students to actively participate and learn from one another.

    Benefit 3 - Increased Access to Information and Resources

    One of the most transformative advantages of using technology in the classroom is the access it provides to a wealth of information. With online databases, academic resources, and educational videos, students can now explore topics far beyond the limits of textbooks.Technology empowers students to take ownership of their learning. For example, a student working on a history project can easily access archives, documentaries, and interactive maps online. This boosts independent learning and encourages curiosity.However, it’s also essential to teach digital literacy, helping students evaluate credible sources, verify information, and use data ethically. This skillset prepares them for the demands of the modern workplace, where critical evaluation of digital information is essential.To highlight this shift, here’s a simple comparison:By incorporating online resources alongside physical tools such as Projector Paint or Whiteboard Paint, teachers can create blended learning environments where digital exploration meets physical interaction, a truly modern approach to learning.

    Benefit 4 - Enhanced Student Engagement and Motivation

    Keeping students engaged is one of the biggest challenges in education. Technology, when used thoughtfully, can transform the way students participate and interact with lesson content.Engagement involves emotional, behavioural, and cognitive investment in learning, and technology supports all three. Interactive whiteboards, virtual reality experiences, and educational apps make lessons more dynamic and visually appealing. For example, a geography lesson can come alive through a virtual tour of world landmarks, while an English class can use multimedia tools to analyse literary themes.Gamified learning platforms such as Kahoot! or Quizlet also keep students motivated through instant feedback and friendly competition. These methods are particularly effective for visual and kinesthetic learners, offering interactive opportunities to grasp complex ideas.Physical technology tools, like Whiteboard Paint or Magnetic Whiteboard Walls, provide hands-on engagement where students can write, draw, and brainstorm directly on surfaces. This bridges the gap between digital and physical learning, promoting creativity and collaboration.By combining digital interactivity with physical collaboration tools, educators can create truly smarter learning environments, classrooms where students are not just passive listeners but active participants in their education.

    Benefit 5 - Better Organisation and Time Management

    Organisation and time management are crucial for both teachers and students. Technology simplifies these processes through digital tools such as online calendars, assignment trackers, and productivity apps.Students can manage their homework, plan projects, and receive reminders about upcoming deadlines. Teachers, on the other hand, can schedule lessons, grade assignments efficiently, and monitor progress through learning management systems (LMS).To further support structured learning, teachers can use whiteboard walls as visual planners, mapping lesson schedules, assignment timelines, and classroom goals. Products like Magnetic Whiteboard Paint make it possible to combine functionality and interactivity on a single surface.By encouraging visual organisation and integrating time management apps, educators can help students develop habits that lead to better academic performance and reduced stress. This approach also prepares learners for professional environments where time management and planning are key.

    Ready to upgrade your experience? Shop Smarter Surfaces' top-rated products today.

    [siteorigin_widget class="SiteOrigin_Widget_Image_Widget"][/siteorigin_widget]
    [siteorigin_widget class="SiteOrigin_Widget_Button_Widget"][/siteorigin_widget]
    [siteorigin_widget class="SiteOrigin_Widget_Image_Widget"][/siteorigin_widget]
    [siteorigin_widget class="SiteOrigin_Widget_Button_Widget"][/siteorigin_widget]
    [siteorigin_widget class="SiteOrigin_Widget_Image_Widget"][/siteorigin_widget]
    [siteorigin_widget class="SiteOrigin_Widget_Button_Widget"][/siteorigin_widget]

    Creating Smarter Learning Environments

    Integrating technology effectively requires more than just adding devices to a classroom; it’s about rethinking the learning environment. Schools that adopt interactive whiteboard paint, magnetic surfaces, and projector paints create flexible, collaborative spaces that encourage participation and teamwork.

    At Smarter Surfaces UK, we design innovative products that help educators transform any wall into a multifunctional workspace. Whiteboard Paint, Magnetic Paint, and Projector Paint are ideal for interactive lessons, group projects, and visual learning activities. These surfaces are cost-effective, durable, and easy to maintain, offering a long-term solution for modern classrooms.

    By combining digital and physical tools, teachers can create truly smarter learning environments, spaces that inspire creativity, communication, and collaboration among students.

    Final Words 

    Technology has revolutionised the education landscape, offering powerful ways to enhance learning outcomes and classroom engagement. From encouraging critical thinking to improving collaboration and access to resources, its impact on education is undeniable.

    By integrating digital tools with Smarter Surfaces’ innovative products, educators can create collaborative, efficient, and interactive classrooms that prepare students for a technology-driven future.

    Transform your learning environment today, explore the full range of Smarter Surfaces Whiteboard and Magnetic Paints designed to support smarter, more engaging teaching

    https://www.youtube.com/watch?v=iONDebHX9qk

    20100326-04

    [siteorigin_widget class="WP_Widget_Custom_HTML"][/siteorigin_widget]
    Best Silver Screen Paint for 3D projection: A Complete Buyer’s Guide

    Best Silver Screen Paint for 3D projection: A Complete Buyer’s Guide

    Best Silver Screen Paint for 3D projection

    1. Introduction
    2. What is Silver Screen Paint?
    3. Evaluation Process For Best Silver Screen Paint For Projector
    4. Benefits of Best Silver Screen Paint for 3D Projection
    5. Key Takeaway
    6. FAQs

    Creating the perfect home cinema experience has become increasingly popular amongst UK homeowners, with the best Silver Screen Paint for 3D Projection technology leading the charge. However, achieving professional-quality results requires more than just an expensive projector – the screen surface plays an equally crucial role.  Silver screen projector paint has emerged as a game-changing solution, offering superior brightness and contrast compared to traditional white screens while maintaining excellent 3D performance.

    What is Silver Screen Paint?

    What is Silver Screen Paint?

    Silver screen paint contains microscopic metallic particles that reflect light more efficiently than conventional white surfaces. This technology dates back to early cinema houses, where silver-coated screens were standard. Modern formulations have refined this concept, creating paints specifically engineered for home projection systems.

    Smarter Surfaces Silver Screen Projector Paint is a 3D projector paint that turns any wall or smooth surface into an ultimate 3D projection screen. Not just high-end home theatres, this specialised paint is ideal for commercial spaces like movie halls, museums, galleries, and event arenas as well.

    What makes it stand out is its ability to reflect a remarkably high percentage of the projected light. This higher light reflection eliminates any loss in picture quality, even in environments with low to medium ambient light. As a result, you get brighter and cleaner images with high depth and clarity.

    Our silver high-gain projector paint can be applied to any wall or smooth surface. You can even use it over old fabric screens to refurbish them. However, it’s not suitable for roll-up screens.

    Now that we have a clear idea about the paint and what it does, here’s a lowdown on the key benefits that make it the best choice for high-definition 3D projection.

    Evaluation Process For Best Silver Screen Paint For Projector

    Evaluation Process For Best Silver Screen Paint For Projector

    The ideal and best silver screen paint for a projector balances multiple factors: 3D performance, colour accuracy, viewing angle requirements, and budget considerations. This section will talk about selecting and applying silver screen paint effectively.

    Step 1: Assess Your Room Conditions

    Before selecting any silver projection paint for home theatre, thoroughly evaluate the viewing environment. Measure ambient light levels during typical viewing times. Silver screens perform well in controlled lighting but can appear overly bright in rooms with significant ambient light.

    Consider the size of the room and the sitting position. Silver screens have good brightness but with limited viewing ranges compared to white screens. Make sure that all seating positions are inside the best viewing area (usually 45 degrees of the centre).

    Document wall texture and condition. Silver screen paints require smooth, properly prepared surfaces for optimal performance. Textured walls may require additional preparation work.

    Step 2: Determine Your Projector Compatibility

    Not all projectors work equally well with silver screens. Check your projector’s specifications for light output (measured in lumens) and colour temperature. Silver screens with the best projector screen paint for 3D amplify brightness, so lower-lumen projectors often benefit significantly from the increased gain.

    Verify 3D capability and polarisation method. Passive 3D systems using polarised glasses work exceptionally well with silver screens. Active 3D systems may not see the same benefits but still perform adequately.

    Test colour accuracy if possible. Some users report that silver screens can introduce a slight cool colour cast. Modern formulations have largely addressed this issue, but testing remains advisable.

    Step 3: Calculate Required Coverage Area

    Measure your intended screen area precisely. Most silver screen paints cover approximately 15-20 square metres per litre, though coverage varies by surface texture and application method.

    Consider screen shape requirements. Standard rectangular screens are straightforward, but curved or custom shapes may require additional planning and masking techniques.

    Step 4: Research Available Products

    Several providers produce quality 3D projector screens but for paint there are only a small number technically capable of producing paint for 3D. For example, Smarter Surfaces is known for what is arguably the best silver screen paint for projector specifically targets 3D projection applications. 

    The formulation includes advanced metallic particles designed to preserve polarisation whilst minimising hot-spotting. Their silver variants provide excellent 3D performance with good colour accuracy.

    Step 5: Evaluate Gain Specifications

    Screen gain measures how much light the surface reflects compared to a standard white screen. Silver screen paints typically offer gains between 1.2 and 2.8.

    Higher gain values provide brighter images but create narrower viewing angles and potential hot-spotting (bright spots visible from certain angles). For most home applications, gains between 1.4 and 1.8 provide the best balance.

    Consider your projector’s brightness when selecting gain. Dim projectors benefit from higher gains, whilst very bright projectors may require lower gains to avoid overwhelming the image.

    Step 6: Plan Surface Preparation

    Proper surface preparation determines final quality more than paint choice. Start with a completely clean, smooth wall surface.

    Fill any holes, cracks, or imperfections with appropriate filler. Sand smooth once dry. Even minor surface irregularities become magnified when projected upon.

    Apply a high-quality primer designed for the specific paint system. Many silver screen paints require specific primers to achieve optimal performance and adhesion.

    Allow adequate drying time between preparation steps. Rushing this process often leads to disappointing results that require complete re-application.

    Step 7: Select Application Method

    Best Silver Screen Paint for 3D projection can be applied using brushes, rollers, or spray systems. Each method offers distinct advantages and challenges.

    Brush application provides excellent control but may leave texture marks. Use high-quality synthetic brushes designed for water-based paints.

    Roller application covers large areas quickly and evenly. Choose rollers with minimal texture – foam rollers often work well for silver screen paints.

    Spray application delivers the smoothest finish but requires proper equipment and technique. Consider a professional application for spray methods unless experienced with spray painting.

    Step 8: Execute Proper Application Technique

    Begin application during optimal environmental conditions – low humidity, moderate temperatures, and minimal air movement.

    Apply thin, even coats rather than attempting to achieve full coverage in one pass. Most silver screen paints require 2-3 coats for optimal performance.

    Maintain wet edges to avoid lap marks. Work systematically across the surface without stopping mid-section.

    Ensure a commercial paint sprayer is used that atomises the paint, small handheld DIY paint sprayers are not suitable.

    Allow proper drying time between coats as specified by manufacturer’s instructions. Inadequate drying can cause adhesion problems and uneven appearance.

    Step 9: Quality Control and Testing

    Inspect the finished surface under proper lighting before projector testing. Look for streaks, uneven coverage, or texture issues that may affect projection quality.

    Set up your projector and test with various content types. Check 3D performance specifically, looking for ghosting or reduced stereoscopic effect.

    Evaluate colour accuracy using test patterns or familiar content. Make note of any colour shifts that may require projector adjustment.

    Test viewing angles from all seating positions. Ensure acceptable image quality throughout your intended viewing area.

    Step 10: Final Adjustments and Optimisation

    Adjust the projector as per your silver screen. This can involve brightness, contrast and colour temperature.

    Include lighting adjustments in the rooms to optimise the performance of the screens. Perceived image quality can be substantially enhanced even by small reduction of ambient light.

    Record your settings and paint specifications in case you will need them in the future. This data is useful in maintenance or troubleshooting.

    Ready to upgrade your experience? Shop Smarter Surfaces’ top-rated products today.

    [siteorigin_widget class=”SiteOrigin_Widget_Image_Widget”][/siteorigin_widget]
    [siteorigin_widget class=”SiteOrigin_Widget_Button_Widget”][/siteorigin_widget]
    [siteorigin_widget class=”SiteOrigin_Widget_Image_Widget”][/siteorigin_widget]
    [siteorigin_widget class=”SiteOrigin_Widget_Button_Widget”][/siteorigin_widget]
    [siteorigin_widget class=”SiteOrigin_Widget_Image_Widget”][/siteorigin_widget]
    [siteorigin_widget class=”SiteOrigin_Widget_Button_Widget”][/siteorigin_widget]

    Benefits of Best Silver Screen Paint for 3D Projection

    Benefits of Best Silver Screen Paint for 3D Projection

    The benefits of silver screen paint below make 3D projection screen paint an attractive option for home cinema enthusiasts, particularly those prioritising 3D content and maximum image quality within their specific viewing environment.

    • Enhanced Brightness and Image Quality

    Silver screen projector paint increases picture brightness as compared to standard white screens. Light is reflected more efficiently by the metallic particles. This makes it suitable for spaces with some ambient lighting or with projectors of lower lumen output.

    • Superior 3D Performance

    The primary advantage of 3D projection is that the paint maintains light polarisation. Traditional white screens tend to depolarise light from 3D projectors, resulting in ghosting and reduced stereoscopic quality. Silver screens preserve the polarised light that is required to produce clear, sharp 3D images with minimal crosstalk between left and right eye images.

    • Improved Contrast Ratios

    Silver screen paint enhances contrast by reflecting more light to viewers while maintaining deep blacks. This creates more vivid, punchy images with better definition between light and dark areas. The increased contrast is particularly noticeable in darker viewing environments.

    • Cost-Effective Solution

    Compared to purchasing a large commercial projection screen, silver screen paint offers excellent value. A typical application costs a fraction of what a quality-manufactured screen would cost, often delivering comparable or superior performance for the specific viewing environment.

    • Customisable Screen Sizes

    Paint allows for completely custom screen dimensions and shapes. Whether creating an ultra-wide cinema format, curved screen, or unusual aspect ratio, paint adapts to any surface configuration. This flexibility is impossible with pre-manufactured screens.

    • Seamless Integration

    Smarter Surfaces best projector screen paint for 3D, when used correctly, forms a flush, built-in look that does not stick out of the wall. This gives it a cleaner look than mounted screens, especially in multi-purpose rooms or areas where the screen may not be used all the time.

    • Reduced Hotspotting

    Quality silver screen paints are formulated to minimise hotspotting – bright spots that can appear with high-gain surfaces. Modern formulations distribute light more evenly across the viewing area compared to older silver screen technologies.

    • Long-Term Durability

    When properly used, the Best Silver Screen Paint for 3D projection can last for 5-10 years with minimal maintenance. Compared to fabric screens that will sag, wrinkle, or get dirty, painted surfaces remain always flat and are simpler to clean as desired.

    • Space Efficiency

    Paint eliminates the need for screen mounting hardware, motorised systems, or storage space for retractable screens. This is particularly beneficial in smaller rooms where every centimetre counts.

    • Professional Results at Home

    Silver screen paint can deliver cinema-quality results in domestic settings, particularly when combined with appropriate room design and lighting control. Many commercial cinemas historically used silver screens for their superior performance characteristics.

    Key Takeaway

    The ideal and the best Silver Screen Paint for 3D projection balances multiple factors: 3D performance, colour accuracy, viewing angle requirements, and budget considerations. Premium products justify their cost through superior performance and longevity, whilst budget options can still deliver satisfactory results for less critical applications.

    The best silver screen paint is the one that works optimally with your specific equipment and room conditions. Take time to research thoroughly, prepare properly, and apply carefully – the results will reward your patience with years of exceptional 3D projection performance.

    [siteorigin_widget class=”WP_Widget_Custom_HTML”][/siteorigin_widget]
    Benefits of Projectors in Education for Better Learning Environments

    Benefits of Projectors in Education for Better Learning Environments

    Benefits of Projectors in EducationTable of Contents
    1. Introduction
    2. Why Projectors Remain Relevant in Modern Classrooms
    3. How Projectors Improve Learning and Retention
    4. Interactive Projectors for Schools
    5. Projector vs Smartboard in Education
    6. Accessibility and Cost Efficiency
    7. Classroom Projector Solutions for 2025
    8. How Projectors Improve Student Engagement
    9. Practical Use Cases of Projectors in Education
    10. Best Practices for Schools Choosing Projector Solutions
    11. Final Thoughts

    The role of technology in education has transformed rapidly, yet some tools remain consistently valuable. One such tool is the classroom projector. Far from being outdated, projectors continue to provide schools and universities with cost-effective and versatile teaching solutions.

    The benefits of projectors in education extend beyond simply displaying visuals; they facilitate collaboration, enhance engagement, and make learning accessible to diverse groups of students.For educators, administrators, and decision-makers, understanding the value of projectors helps in creating a balanced technology strategy. This article explores why projectors in education remain an essential resource in 2025 and how they compare to other modern teaching tools.

    Why Projectors Remain Relevant in Modern Classrooms

    ProjectorsAs digital transformation accelerates, schools are increasingly integrating tablets, smartboards, and interactive panels into classrooms. While these tools have value, projectors continue to offer unique advantages.Modern teaching tools projectors, provide flexibility that permanent installations, such as smartboards, cannot match. Projectors can transform any flat surface, walls, screens, or even interactive projector screen paint, into a learning space. This adaptability makes them particularly useful in smart classroom environments where space, cost, and scalability matter.Another reason projectors remain relevant is their ability to serve both small classrooms and large lecture halls. Unlike single-screen devices, projectors scale easily, ensuring every student has a clear view of the content. Their long-term viability, combined with cost efficiency and low maintenance, keeps them at the forefront of educational technology.

    How Projectors Improve Learning and Retention

    How Projectors Improve Learning and Retention One of the strongest benefits of projectors in education is their impact on student learning and retention. Studies show that learners absorb information better when concepts are presented visually. Projectors allow teachers to display diagrams, presentations, videos, and interactive simulations that make complex subjects easier to understand.For example, how projectors improve retention in middle school classroom is evident when abstract subjects like mathematics or science are presented visually. Instead of relying on textbooks alone, teachers can use projectors to demonstrate real-life applications and reinforce memory through repetition.In addition, projectors support different learning styles. Visual learners benefit from diagrams and videos, while auditory learners engage better with combined audio-visual material. This flexibility makes projectors a valuable tool for inclusive classrooms where learning differences must be addressed.

    Interactive Projectors for Schools

    Interactive Projectors for SchoolsPicture an entire wall like an iPad where students are literally touching the wall and it responds like a iPad its impressive to see and highly engaging.The rise of interactive projectors for schools has taken classroom engagement to the next level. Unlike traditional projectors, interactive models allow students and teachers to write, draw, and manipulate digital content directly on the projection surface.The interactive projector classroom benefit lies in increased participation. Students can really get involved engaging with each other, collaborating on problem-solving tasks, annotate shared materials, and contribute ideas in real time. This hands-on approach helps reinforce understanding and builds confidence.For educators, interactive projectors simplify lesson delivery. Instead of switching between devices or writing manually on whiteboards, they can smoothly present and interact with digital content. In many cases, interactive projectors are also more cost-effective than equipping every student with personal tablets.Being able to draw down the latest software directly makes it easy for teachers to stay on point with content and innovation.

    Ready to upgrade your experience? Shop Smarter Surfaces' top-rated products today.

    [siteorigin_widget class="SiteOrigin_Widget_Image_Widget"][/siteorigin_widget]
    [siteorigin_widget class="SiteOrigin_Widget_Button_Widget"][/siteorigin_widget]
    [siteorigin_widget class="SiteOrigin_Widget_Image_Widget"][/siteorigin_widget]
    [siteorigin_widget class="SiteOrigin_Widget_Button_Widget"][/siteorigin_widget]
    [siteorigin_widget class="SiteOrigin_Widget_Image_Widget"][/siteorigin_widget]
    [siteorigin_widget class="SiteOrigin_Widget_Button_Widget"][/siteorigin_widget]

    Projector vs Smartboard in Education

    When schools consider new teaching technology, the choice often comes down to a projector vs a smartboard in education. Both tools aim to enhance learning, but their strengths differ. Here is a quick comparison:Projector vs Smartboard in EducationFrom a financial and practical standpoint, cost-efficient classroom projectors offer better return on investment, especially for schools managing multiple rooms. While smartboards can be useful in smaller, high-tech environments, projectors provide the broader, more scalable solution.

    Accessibility and Cost Efficiency

    In modern education, accessibility is as important as technology. Projector accessibility in classrooms ensures that every student, regardless of where they sit, can clearly view the lesson content. This visibility is particularly beneficial in larger classrooms or auditoriums.Projectors are also inclusive for students with special needs. Teachers can adjust screen size, brightness, and contrast to support students with visual or cognitive challenges. Combined with assistive software, projectors become a powerful accessibility tool.Financially, cost-efficient classroom projectors are an attractive choice. Compared to alternative educational technologies, projectors have lower installation costs and reduced maintenance needs. Many models today are low-maintenance projectors for education, with lamp-free designs that last longer. This durability significantly reduces the total cost of ownership for schools.

    Classroom Projector Solutions for 2025

    Classroom Projector Solutions With the education sector evolving, schools now require adaptable and future-proof technology. Classroom projector solutions in 2025 include a variety of models, from standard projectors to products like ultra-short-throw projector screen paint.Modern applications extend beyond traditional projector screens. Smarter Surfaces projector screen solutions, including projector screen paints and wallpapers, allow schools to transform entire walls into interactive learning spaces. These solutions eliminate the need for bulky screens, creating smooth and modern teaching environments.Whether for small classrooms, large lecture halls, or multipurpose training rooms, projectors continue to serve as versatile educational technology. Their ability to integrate with existing systems and adapt to new learning methods makes them an essential investment.

    How Projectors Improve Student Engagement

    Engagement is one of the most critical elements of effective learning. In the UK and globally, educators consistently ask: how do projectors improve student engagement in schools?The answer lies in visual stimulation and collaboration. Projectors allow teachers to integrate videos, interactive exercises, and real-time digital content into lessons. Students engage better when lessons are dynamic and visually appealing, compared to static textbooks or lectures.In group activities, projectors also encourage teamwork. Students can present projects, share findings, and collaborate using projected displays. In hybrid or blended classrooms, projectors make it easy to share content across in-person and remote learners simultaneously.By transforming lessons into interactive experiences, a smart classroom projector helps bridge the gap between traditional teaching and digital engagement.

    Practical Use Cases of Projectors in Education

    The versatility of educational technology projectors makes them suitable for various levels of learning. In each of these environments, modern teaching tools projectors, support both educators and students by making lessons more impactful and accessible.

    Primary Education

    Projectors in Primary EducationIn primary classrooms, projectors make lessons more engaging by displaying storytelling visuals, interactive alphabet charts, and animated lessons. These dynamic tools help capture young learners’ attention and support early literacy and numeracy development.

    Secondary Education

    Projectors in Secondary EducationFor secondary students, projectors enhance complex subjects such as science and mathematics. Teachers can display simulations, graphs, and problem-solving exercises that simplify abstract concepts and encourage active participation.

    Higher Education

    Projectors in Higher Education In universities and colleges, projectors are essential for lecture halls and seminar rooms. They support large-scale presentations, research sharing, and collaborative workshops, ensuring information is delivered clearly to all students.

    Best Practices for Schools Choosing Projector Solutions

    For administrators making purchasing decisions, selecting the right projector solution requires careful consideration. By focusing on scalability, efficiency, and long-term cost savings, schools can select projector solutions that align with both educational and financial goals. There are some factors to assess, including:Best Practices for Schools Choosing Projector Solutions
    • Room Size & Layout: Large lecture halls need high-lumen projectors for clarity, while smaller classrooms are best served by ultra-short-throw models to reduce glare.
    • Maintenance & Longevity: Select low-maintenance projector solutions with extended lamp life to lower operational costs.
    • Integration with Learning Tools: Ensure the projector is compatible with existing digital platforms, software, and interactive classroom technologies.
    • Screen Alternatives: Evaluate cost-efficient options such as projector screen paint or wallpapers, which save space and offer modern flexibility compared to traditional projector screens.

    Final Thoughts 

    The benefits of projectors in education are clear: they are versatile, cost-efficient, and highly effective in enhancing learning. In 2025, projectors will remain one of the most practical and scalable classroom technologies, offering schools the ability to engage students, improve retention, and deliver inclusive education.As schools look toward modernising teaching spaces, classroom projector solutions, paired with innovations like Smarter Surfaces projector screen solutions, provide the flexibility and long-term value required for today’s smart classrooms. For educators and administrators seeking reliable, low-maintenance, and cost-effective technology, projectors continue to be one of the best investments in modern education.
    [siteorigin_widget class="WP_Widget_Custom_HTML"][/siteorigin_widget]
    Smarter Surfaces
    Privacy Overview

    This website uses cookies so that we can provide you with the best user experience possible. Cookie information is stored in your browser and performs functions such as recognising you when you return to our website and helping our team to understand which sections of the website you find most interesting and useful.