All You Need to Know about Whiteboard Paint for Walls

All You Need to Know about Whiteboard Paint for Walls

whiteboard paint for walls for meetings with clients

A whiteboard is a flat, smooth, typically (not necessarily) white surface that can be written on with dry-erase markers and easily wiped clean. It’s a versatile tool for writing, drawing, presenting information, and collaborating in various settings such as classrooms, offices, and meeting rooms but with one major limiting factor: size. Whiteboard paint for walls can add a completely new dynamic to a space by turning an entire regular wall into a whiteboard.

What is whiteboard paint for walls?

Whiteboard paint is a special type of paint or coating that turns any smooth surface such as a wall, or a tabletop into a dry-erase, writable surface. You can write on it with any normal dry-erase markers and wipe the board clean with a microfibre cloth.

How does whiteboard paint work?

Whiteboard paint is a combination of specialist resin designed to create a smooth, hard, writable surface. Once the paint is dry after application, the specialist resin present in it makes the surface smooth and writable, just like a whiteboard. The resin makes sure that the paint is hard enough to endure writing and wiping for a prolonged period of time.

What are the benefits of applying whiteboard paint on a wall?

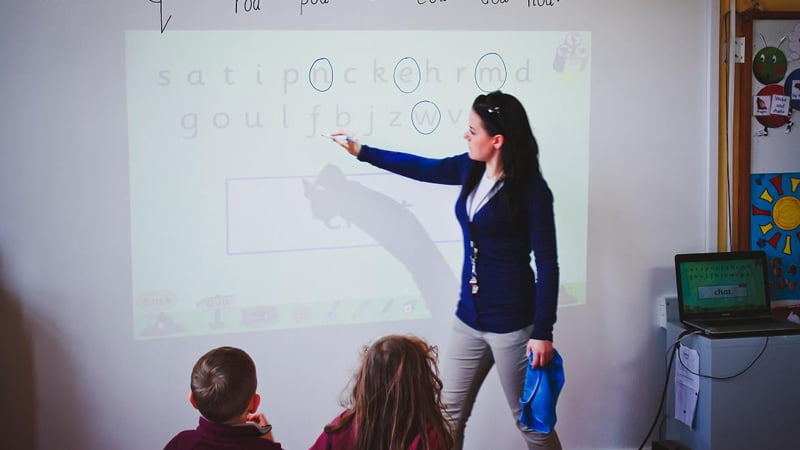
When you turn a regular wall into a whiteboard, it becomes more than just a wall. It changes how people interact with spaces. The walls become centres for communication, collaboration, and creativity.

Top benefits of a writable wall in an office setting

  • Creates an atmosphere of creativity and expression
  • Increases the collaborative potential of every meeting
  • Helps leaders create a better impact and a lasting impression with the help of visual cues while discussing strategy
  • Maximises the potential of wall spaces that are unusual as the paint can go around doors windows and fixtures
  • Becomes a centre for fun activities in the office (it’s perfect for a session of Pictionary).
  • Creates a positive and engaging space for idea-sharing

A large whiteboard wall is equally beneficial in a classroom setting

  • Creates a large working canvas that has room to leave lots of information up over time without needing to erase for day to day work
  • It gives students more space to innovate and interact
  • Relieves teachers and students from the dust, allergies, and dry skin that come with a chalkboard
  • The writable area in a classroom is not limited by the size of a traditional wall-mounted whiteboard.
  • Encourages active participation

Rathoath Junior School - whiteboard paint for walls

How many types of whiteboard paints are there?

Primarily, there are two types of whiteboard paints
1. White whiteboard paint

As the name suggests, white whiteboard paint turns a regular wall into a white, dry-erase surface, this is also available in magnetic whiteboard paint.

2. Clear whiteboard paint

Clear whiteboard paint turns any smooth surface into a writable area of any colour. That means, if you have a blue wall and put a coat of clear whiteboard paint on it, it will turn into a blue writable wall.

Whiteboard paints can be further classified based on gloss levels, base materials, and intended use cases. For instance, antimicrobial whiteboard paint can be used to create safer, antimicrobial writable surfaces whereas, matt whiteboard paint with anti-glare properties helps you create a wall you can both write and project on.

How to choose the right whiteboard paint?

You cannot go wrong with white whiteboard paint if your main goal is to create a writable surface in an office space or a classroom. A white writable surface has great visibility, and you can use markers in any colour on it without compromising clarity.

However, if you intend to create a writable wall that aligns with the brand colours or complements the colour and overall aesthetics of a building, then you should go with clear whiteboard paint.

Things to keep in mind while buying whiteboard paint for walls

  • The paint should be fire-proof, and environmentally friendly with certified levels of VOC, isocyanates, etc.
  • It should come with a performance guarantee
  • The seller should provide you with application guidelines and an application kit
  • You should be able to use any marker on the wall after painting
  • It should be easy to apply and ready to use within a week

How to apply whiteboard paint on a wall?

The steps of applying the whiteboard paint for walls can vary based on the brand of the paint. Here, we’ll discuss the application procedure for the smart whiteboard paint manufactured by Smarter Surfaces.

1. Preparing the wall

A primed or painted wall does not need a lot of preparation. You can just sand off any minor inconsistencies in the surface and move on to the next step.

If your wall is not smooth – has holes, or bumps, or isn’t primed – here is what you do.

  • Use a regular decorator’s filler to fill the holes
  • Apply two coats of high-quality primer and wait for it to dry out
  • Sand off any rough spot

2. Applying the paint

The smart whiteboard paint (clear and white) by Smarter Surfaces has two parts – A and B.
You need to pour all of A into B and stir it well for a few minutes to achieve a perfect blend.
Use the roller provided in the application kit to apply the paint to small sections of the wall. Check for any inconsistency before moving to the next section.

3. Using the wall for writing

After painting the wall takes 4-5 hours to become touch dry. However, you should wait 4 days before using the wall for writing so that the paint hardens properly and you get a smooth finish.

You can use dry-erase markers to write on the wall and microfibre cloths to erase it.

How to maintain and clean a whiteboard wall?

Maintaining a whiteboard wall is very easy. With a few accessories, you can boost its longevity and retain its performance for years.

  • Use good-quality dry-erase markers to write on the wall
  • Clean it using a piece of microfibre cloth and dry-erase cleaner at the end of the day.
  • Get rid of stubborn stains and undo accidental usage of a permanent marker using a permanent marker remover. Please note that this is not for regular cleaning.

The smart whiteboard paints by Smarter Surfaces come with a 10-year performance guarantee.

Is it possible to use whiteboard paint to refurbish an old chalkboard or a wall-mounted whiteboard?

It absolutely is.

Since a chalkboard has a relatively rough surface and an old chalkboard may even have crack lines, it is better to apply a couple of coats of primer to prepare it for the whiteboard paint. Once the surface is smooth and dry, you can apply the paint to turn an old chalkboard into a brand-new whiteboard.

Priming is not needed in the case of an old whiteboard. You can go ahead and apply the paint.

Is it possible to turn a wooden wall into a clear whiteboard?

So, you want to turn a wooden wall into a whiteboard without changing the outlook. That is possible, thanks to the smart whiteboard paint clear by Smarter Surfaces and the clear primer.

First, apply two coats of clear primer to eliminate the porosity of the wooden surface and prepare it for the whiteboard paint. Apply a coat of the smart whiteboard paint clear to the primed wooden wall.

In 4 days, you will have a write-on wipe-off wooden wall. The same process can be followed to turn a wooden table or a glass surface into a whiteboard.

More interesting possibilities

You can add a layer of magnetic paint to your primed wall before applying the whiteboard paint to turn it into a magnetic whiteboard wall. It will allow you to stick sheets of paper, photos, maps, charts, etc. on the writable wall with the help of magnets.

By applying low-sheen whiteboard paint, you can use a wall for both writing and projecting. It can be used to great effect during presentations.

Get all the advice you need around whiteboard paint for walls

The product advisors and industry experts at Smarter Surfaces are ready to answer any question you may have regarding whiteboard paints, magnetic paints, wallpapers, and projection paints.

You can book a free video consultation with us where you show us the wall you want to transform, talk to us about your goals, and we will help you find the most effective products for the purpose.

Thanks to the easy-to-follow application guides, and all-in-one application kits sent along with the paint, anyone can apply the smart whiteboard paints on a wall. If you get stuck or face any issue, consult the application videos or just Get in touch.

Add Customised Branding To Your Office With A Custom Printed Magnetic Whiteboard

Add Customised Branding To Your Office With A Custom Printed Magnetic Whiteboard

Loudmouth with smarter surfaces - printed magnetic whiteboard

First impressions really do count. Whenever a potential customer or employee enters your office the first things they see can help dictate the impression they get of your entire company.

For instance do they see a number of individual office cubicles and drab colour palettes or are they greeted with innovative and inventive pieces of company branding?

Office design is an important aspect and incorporating your branding into the layout can be a great way to make the most of your space. But before you begin your renovation, you need to come up with some office wall branding ideas and to do this you need to know how adding branding to your office can help and what products you can use. One way we suggest you add customised branding to your space is by designing and installing a printed magnetic whiteboard.

Sound interesting? Keep reading below and find out more.

Benefits Of Showcasing Customised Branding In Your Office

Showcasing your branding throughout your office can be very beneficial. It can be a big aspect in determining not only how your customers see you, but how your employees do.
Employee Satisfaction
How your staff views the company can be just as important as how your customers view it. Studies have shown a direct comparison between office design and productivity. Having innovative office branding that showcases your company as a forward thinker will give employees confidence in the company they work for. Meanwhile on average staff who feel they are working in a modern company are more loyal and inspired to work even harder.

Client Satisfaction
Customers can make up their minds simply based on the office building they have walked into. By adding your branding in a modern way to your office anyone who visits will immediately be able to tell who you are and what you want to achieve. In addition to this having seen how professional your office looks your potential clients will leave confident in the brand.

Magnetic Whiteboard Whiteboard in Club Petit Pierrot by SengFlo Designs

But Why Choose A Printed Magnetic Whiteboard?

You’ve already heard why adding branding to your office space can be beneficial to your company, but why should you choose a printed magnetic whiteboard?

A personalised whiteboard allows you to make an impact with your customers. Firstly having a well placed piece of branding in your foyer or lobby will help them remember you a long time after your meeting.

Secondly having a printed magnetic whiteboard in your office allows customers, who are always interested in visuals, to see the professionalism of your company.

You choose exactly what you present to your clientele. Ask yourself what message you want to get across with your branding What colours? Present yourself exactly as you want to be seen with a printed magnetic whiteboard and impress everyone.

Key Benefits Of A Smart Custom Magnetic Dry Erase Board

What are the key benefits of a printed magnetic whiteboard like Smart Custom Magnetic Dry Erase Board? We’ve listed some of the key benefits below.

  • Your personalised whiteboard is completely customisable. As a result you can have any shape, any size and any colour you like
  • Completely manufactured in the UK
  • It’s a great example of company branding that presents an extremely professional appearance for your business
  • It’s very easy to install – each board comes with an easy to follow installation guide
  • Each personalised board is completely unique to the customer
  • Guaranteed for 5 years

We offer pre-made bundles of magnetic whiteboard paints, available in white and clear variants. You can either have a white magnetic wall or a colored magnetic wall if you use clear magnetic whiteboard paint in your space.

Check out our customer’s video on how they customized their office’s whiteboard wall with our whiteboard solutions. Watch the video here:

There are so many ways that you can benefit from adding a printed magnetic whiteboard to your office. If you have any questions about how to create custom magnetic dry erase boards, we are here to help you. Book a free video consultation now and talk to our experts.

Convert Your Desk Into A Dry Erase Surface

Convert Your Desk Into A Dry Erase Surface

Convert Your Desk Into A Dry Erase Surface

Are you always trying to find something to write on when on an important phone call?

Are mountains of paper constantly piling up on your desk?

It doesn’t have to be that way.

Why not turn your desk into a dry erase surface with Smart Whiteboard Paint in Clear?

It’s so simple to apply, anyone can create their own writable desks.

Keep reading below to find out more about whiteboard desks.

Benefits of a Dry Erase Surface

On the phone and someone starts giving you their contact details? No problem.

When your desk is also a dry erase surface you can simply write everything you need to on your desk and wipe away when you’re done.

Maybe you’re trying to find a better way to organize your daily tasks?

Instead of writing them in a document that gets lost in your computer, just write your agenda straight onto your desk.

You’ll be able to just glance down and remind yourself of what you need to do next.

You also get the added bonus of wiping away a task when you complete it.

Is there anything more satisfying?

Writable desks aren’t just for personal use either.

These desks come in handy during meetings and brainstorming.

Trying to explain something to a colleague but you can’t quite get it across? Draw it out on your desk to better visualize what you are discussing.

As they say, a picture is worth a thousand words!

Desks and Benches Transformed

How To Convert Your Desk Into A Dry Erase Surface

So, now that you know how a writable desk could benefit you, you’re probably wondering how do you create your own?

Well you’re in luck.

Creating your own writable desk is really easy to do and takes just two steps.

And that’s it!

Once you’ve completed these 2 steps you’re dry erase surface will be ready to use in just 7 days.

This waiting period is to allow the paint to fully cure so that you can get maximum dry erase performance.

Check out this video for how to apply Smart Whiteboard Paints.

So, what are you waiting for? Create the most efficient desk you will ever use today.

Have you any questions regarding our products? Call us on the relevant number below and our friendly advisors will assist you. Alternatively we are on live chat an all of our websites between 09.00-17.00 GMT.

UK: +44 (0)2035 145395

Global: +353 1 4126200

How to Create a Whiteboard Wall in any Colour in 4 Steps

How to Create a Whiteboard Wall in any Colour in 4 Steps

So you want to install a whiteboard wall in your office but don’t want it to be white?
We have the solution for you…

You can turn any coloured wall into a dry-erase writable surface using clear whiteboard paint. You will end up with a large writable surface for your teams to collaborate and brainstorm on while retaining the original colours of your office walls. In this post, we’ll discuss the steps of creating a coloured whiteboard wall and share some interesting ideas for you to explore.

Clear whiteboard wall in meeting room wall writable table

What is a transparent or clear whiteboard paint wall?

A whiteboard paint wall is a wall that you use as a whiteboard – you can write on it with markers and wipe off the writing with a dry microfibre cloth. A transparent whiteboard wall is one that retains the original colour of the wall. So, if you have a blue wall in your office that you want to turn into a whiteboard without changing its colour to white, you go for a clear whiteboard paint and apply it straight over your blue paint.

The great advantage of a full whiteboard wall in a colour of your choice is firstly it can match things like corporate branding or colour schemes of a business or school but more than that, it’s the large writable surface area you get. Without the size limitations of a traditional board, a whiteboard wall changes the way people interact with space. It motivates collaboration and drives creativity without constraints.

How does clear whiteboard paint work?

Clear whiteboard paint is made from a special resin infused with nanotechnology, that when the paint is dry it creates a smooth, durable, and invisible barrier between the surface of the wall and the ink of the dry-erase markers. Hence, you can easily write on and clean off the whiteboard wall.

Steps to creating a clear whiteboard paint wall

Turning a regular wall into a large whiteboard wall in any colour is a fairly simple task that can be performed even by non-professionals. You just need the right guidelines.

Step 1: Measure the area
Measure the height and the width of the wall you want to convert into a transparent writable surface. Multiply the height and the width to get the area. So, if the wall has a height of 3 metres and a width of 4 metres, you’d need enough paint to cover an area of 12 square metres.
Smarter Surfaces has a simple guide on each pack to explain the exact surface area you can cover with a tin of paint in the product descriptions. For instance, you can buy clear whiteboard paint in three sizes – 2 m², 6 m², and 18 m².

Step 2: Prepare the wall
If your wall is painted and smooth, it won’t need a lot of preparation. Just cover the edges of the area where you’re about to apply the clear whiteboard paint using a broad masking tape.

In case your wall is not smooth, has holes and inconsistencies, or if the paint colur has faded, you need a few more steps of preparation but not too much.

  • Fill the holes: Use a regular decorator’s filler to fill any holes in the wall. Sand the area off to make it smooth.
  • Colour the wall: Apply the coloured paint of your choice and wait for it to dry completely.

Step 3: Clear Whiteboard Paint
The Smarter Surfaces Clear Whiteboard Paint has two parts: Part A and Part B.

Once your wall is ready for application, pour the entirety of Part A into Part B and stir it for at least 5 minutes with the stick provided in the application kit until you achieve a perfect blend.

You’ll find a roller handle and a pair of roller sleeves in the application kit. Use them to prepare the roller. You should prepare the roller before mixing the paint as you must apply the paint on the wall within an hour of mixing part A with part B.

Step 4: Apply the paint
Apply the clear whiteboard paint in sections and check each section as you go to ensure no missed spots

  • Pour the paint mix into a painting tray and soak the roller in it
  • Make sure the entire roller is covered in paint but it’s not dripping
  • Apply the paint with the roller passing over the surface 10 times with even pressure to ensure no missed patches
  • Check for inconsistencies from at least 3 viewing angles and apply more paint if necessary

The clear whiteboard becomes touch dry in 5 hours but you should 4 days before using it as a whiteboard to allow those nanoparticles to do their work. This amazing product comes with a 10-year performance guarantee from Smarter Surfaces.

Is it possible to turn a wooden surface into a clear whiteboard?

Yes, it is.
Wood is porous and soaks in paint. Hence, you would need to prime the wooden surface using a clear primer to prepare it for the clear whiteboard paint. Once the clear primer dries out completely you can apply the clear whiteboard paint.

Is it possible to create a magnetic clear whiteboard wall?

Yes, it is. In fact, Smarter Surfaces has a specially designed package for it complete with smart magnetic paint, clear whiteboard paint, neodymium magnets, and everything else necessary for application. Creating a magnetic clear whiteboard wall has the additional step of applying the magnetic paint before you paint the wall with the colour of your choice.

Whiteboard Wall DIY with expert guidance from Smarter Surfaces

Thanks to the all-in-one application kit, detailed guidelines, and application videos, you can easily create a writable transparent whiteboard wall by yourself with Smarter Surfaces products. However, some issues may arise while doing it. In any such event, you can consult with the experts at Smarter Surfaces for free advice and guidance

Even before making a purchase, you can book a free video consultation call with our product advisors. If you’re unsure what product to choose or how much to buy, simply upload pictures and videos of your wall, and we will guide you through.

You can always refer to the video application guides during the process of application to ensure that you’re doing it correctly.

How to Create a Writable Wall & What Are the Benefits?

How to Create a Writable Wall & What Are the Benefits?

  1. Introduction
  2. Types of Writable Walls
  3. What are the different ways of creating a writable wall?
  4. What are the Writable Wall Benefits?
  5. Whiteboard Paint vs. Whiteboard Wallpaper: Which Should You Choose?
  6. Key Takeaway

Benefits of Projector Screen Paint for Walls

A writable wall adds a fresh dynamic to an office space where the size of a whiteboard does not limit the spirit of collaboration and innovation. When someone tries to express an idea with words, diagrams, charts, and whatnot in front of a congregation of colleagues, you do not want that individual to be worried about running out of space. In a way, a writable wall unlocks the free flow of ideas in offices as well as classrooms. Let’s discuss more on how to create a writable wall at home, what are writable wall ideas for office and classroom,  and how to apply whiteboard paint on a wall.

Types of Writable Walls

Finding the right writable wall for your space doesn’t have to be complicated. Whether you’re setting up a home office, classroom, or creative studio, there’s probably a perfect solution waiting for you. Let me walk you through the main options.

1.  Chalkboard Paint Walls

Remember the satisfaction of writing on an actual chalkboard? You can bring that feeling into any room with chalkboard paint. This material turns plain walls into a surface where you can write notes, draw, or allow your children to create pieces of art.

The old-fashioned and rustic appearance of chalkboard walls is popular among many people, and it is used in a surprisingly wide range of places (modern kitchens to traditional home offices).

2. Whiteboard Paint Walls

If you’d rather skip the chalk dust entirely, whiteboard paint might be your answer. It provides a dry erase surface that is smooth and glossy. The finish is more polished and contemporary than chalkboard paint.

These walls are perfect for brainstorming and planning sessions. The white surface reflects the light well, thus making the rooms look brighter and open. All you have to do is ensure that you are using quality dry-erase markers because cheap ones will leave behind stains.

3. Whiteboard Wallpaper

Whiteboard Wallpaper is the best alternative for those who don’t want permanent changes. Smarter Surfaces Whiteboard Wallpaper peels off and sticks right to your wall without any paint or mess. When you’re done with it, you can remove it without damaging the surface underneath.

The surface works well with standard dry-erase markers, and cleaning is simple—just wipe it down.

4. Magnetic Writable Walls

Why choose between writing and hanging things when you can have both? Magnetic writable walls combine a writing surface with magnetic properties, letting you pin up papers, photos, or notes alongside your written content.

These walls are practical for organising spaces. Imagine a notes center in your kitchen where you can write the weekly menu and magnetically attach shopping lists and coupons. Or a project wall where you can sketch ideas and stick up reference images. The versatility makes these walls popular in both homes and offices.

What are the different ways of creating a writable wall?

Creating a writable wall is easier than most people think. You don’t need to be a professional contractor or have special skills—just a free weekend and some patience. Let’s see how to create a writable wall.

1. How To Install Chalkboard Paint on Walls

Getting a chalkboard wall up takes a bit of prep work. But the process is fun. Here’s how to do it right.

Step 1: Cleaning – Start by cleaning your wall thoroughly. Any grease or dirt will mess with paint adhesion, so wipe everything down with a damp cloth and let it dry completely. If your wall has holes or imperfections, fill them with spackling paste and sand smooth once dry.

Step 2: Preparation – Apply painter’s tape around the edges of your intended chalkboard area. This keeps your lines clean and protects adjacent walls or trim. Put down drop cloths to catch any drips—chalkboard paint can be thick and messy.

Step 3: Application – Use a foam roller for the smoothest finish, though a regular roller works too. Apply your first coat in even, overlapping strokes. The coverage might look patchy at first, which is totally normal. Let this coat dry for about 2hrs.

Step 4: Application – Apply your second coat the same way. After your final coat, remove the painter’s tape while the paint is still slightly tacky—this prevents the tape from pulling off dried paint.

Step 5: Usage – Your wall needs to cure for 24 hrs before you write on it. Rushing this will damage the surface. Once cured, “season” the wall by rubbing the side of a piece of chalk all over it, then erasing. This fills in the paint’s pores and prevents permanent ghosting later on.

Tip: Clean the chalkboard surface with a micro-fibre eraser cloth.

2. How to apply whiteboard paint on a wall?

The good thing about whiteboard paint is that you can apply it to any wall regardless of its shape, surface area, or obstructions. The following are the steps you need to follow.

Step 1: Prepare the Wall Surface – Check for holes, bumps, or rough spots. Fill any holes with decorator’s filler and sand away imperfections until the wall is smooth.

Step 2: Prime the Wall – Apply two coats of high-quality primer, sanding lightly between coats. Let the wall dry completely before proceeding. Skip priming if your wall is freshly painted or already perfectly smooth. For magnetic functionality, add three coats of magnetic paint before the whiteboard layer.

Step 3: Mix the Whiteboard Paint – Smarter Surfaces whiteboard paint comes in two parts: Part B (paint tin) and Part A (small bottle). Pour all of Part A into Part B and stir thoroughly for at least 5 minutes using the provided stirring stick.

Step 4: Apply the Paint – Do a final check for imperfections and sand if needed. Work in small sections (about 1m²), using masking tape on the edges for clean lines.

Pour paint into a tray and load your roller evenly—enough to cover the sleeve but not so much that it drips. Roll up and down with consistent pressure for smooth coverage. Check for missed spots before moving to the next section.

The paint needs approximately 4 days to fully cure before your writable wall is ready to use.

For more detailed information, you can check here.

3. How to apply the whiteboard wallpaper?

The application process for the whiteboard wallpaper has simple three steps.

Make sure there are no air bubbles or excess adhesive underneath the wallpaper by pushing them out with a plastic spatula supplied with the product. 

You can use a damp cloth to clean the surface and get rid of any adhesive residue along the edges or overlaps. In 24 hours, the wallpaper will be ready for use, and you will have a fully functional writable wall.

4. How to create a magnetic writable wall in any colour?

Magnetic paint is used as a base layer under whiteboard paint. These walls are practical for organising spaces. The magnetic strength varies by product—some hold papers easily, while others can support heavier items. Let’s see how to install them.

  • Prime the wall
  • Add 4 coats of magnetic paint or 2 coats of magnetic plaster for superior magnetic functionality. Wait till the surface is dry.
  • Apply any paint in a colour of your choice
  • Apply a coat of clear whiteboard paint once the paint is completely dry.

In 4 days, you will have a writable wall with magnetic qualities. You can use this approach to create writable walls that align with your brand colours or complement the aesthetic appeal of your office space.

What are the Writable Wall Benefits?

Writable walls have become increasingly popular in homes, offices, and educational spaces—and for good reason. They offer practical advantages that go beyond just having a place to jot down notes. Let me walk you through why so many people are making the switch.

1. Boosts Creativity and Brainstorming

You can sketch out concepts, draw mind maps, or connect thoughts across a large surface without worrying about running out of room.

This expanded canvas encourages visual thinking. Instead of linear notes, you can create diagrams, flowcharts, or illustrations that help you see connections you might otherwise miss. Many people find that physically standing and writing engages their brain differently than sitting at a keyboard does.

2. Improves OrganiSation and Productivity

A writable wall serves as a constant visual reminder of your priorities and tasks. 

Families can use them to coordinate schedules, track chores, and plan meals. Home offices benefit from project timelines and daily goal tracking. The ability to see everything at once reduces mental clutter and helps you stay focused on what matters most.

3. Enhances Collaboration

When teams work together on a writable wall, everyone can contribute simultaneously. Multiple people can add ideas, make connections, or refine concepts in real time. This collaborative approach feels more inclusive than one person typing while others watch a screen.

The temporary nature of dry erase or chalk also removes the pressure of perfection. This openness often leads to better solutions and more innovative thinking.

4. Creates Flexible Learning Environments

Parents and teachers appreciate writable walls for their educational value. 

The ability to demonstrate concepts visually helps explain complex topics more clearly. Whether you’re teaching a child fractions or explaining a business strategy to colleagues, drawing it out on a wall makes abstract ideas more concrete and understandable.

5. Adds Functionality Without Sacrificing Style

Modern writable walls come in various finishes and colours that complement your existing décor. Chalkboard walls bring a trendy, industrial vibe. Whiteboard surfaces offer clean, minimalist aesthetics. You’re not sacrificing design for functionality—you’re adding a feature that can actually enhance your space. This makes them ideal for smaller rooms or apartments where every square foot counts.

6. Reduces Paper Waste

Think about how many sticky notes, notepads, and printed documents you go through. A writable wall cuts down on this waste significantly. You can update information directly on the wall instead of printing new versions or buying more paper products.

For businesses conscious about their environmental impact, this reduction in paper consumption aligns with sustainability goals while also cutting supply costs over time.

7. Encourages Communication

In shared living or working spaces, writable walls become natural communication hubs. This visible, central location for information means fewer missed messages and better coordination among everyone sharing the space. It’s useful for households with different schedules where people might not cross paths regularly.

8. Offers Cost-Effective Solutions

Compared to constantly buying notebooks, planners, calendars, and sticky notes, a writable wall that too with magnetic feature is a one-time investment that pays for itself over time. Even the initial cost is often less than purchasing multiple traditional whiteboards or planning systems.

The durability of quality writable walls means they last for years with minimal maintenance. A simple wipe-down keeps them functioning like new, unlike paper products that need constant replacement.

Ready to upgrade your experience? Shop Smarter Surfaces’ top-rated products today.

[siteorigin_widget class=”SiteOrigin_Widget_Image_Widget”][/siteorigin_widget]
[siteorigin_widget class=”SiteOrigin_Widget_Button_Widget”][/siteorigin_widget]
[siteorigin_widget class=”SiteOrigin_Widget_Image_Widget”][/siteorigin_widget]
[siteorigin_widget class=”SiteOrigin_Widget_Button_Widget”][/siteorigin_widget]
[siteorigin_widget class=”SiteOrigin_Widget_Image_Widget”][/siteorigin_widget]
[siteorigin_widget class=”SiteOrigin_Widget_Button_Widget”][/siteorigin_widget]

Whiteboard Paint vs. Whiteboard Wallpaper: Which Should You Choose?

Deciding between whiteboard paint and whiteboard wallpaper can feel tricky when both promise to transform your wall into a functional writing surface. Each has its strengths and limitations, and the right choice really depends on your specific situation. Let me help you figure out which option makes the most sense for you.

1. Installation: Time and Effort Required

Whiteboard paint demands more upfront work. You’ll spend time prepping the wall—filling holes, sanding imperfections, and applying primer. The actual painting process involves precise mixing of two-part formulas and careful application techniques. Then comes the waiting time: roughly seven days before you can actually use your new surface.

Whiteboard wallpaper, on the other hand, goes up quickly. Most people can apply it in an hour or two. There’s no mixing, no complicated prep beyond cleaning the wall, and no waiting period. Peel, stick, smooth out the bubbles, and you’re done. You can start writing on it immediately.

If you’re working on a tight timeline or prefer instant gratification, wallpaper wins here. But if you don’t mind investing a weekend and waiting a week, paint becomes more feasible.

2. Durability and Longevity

Paint creates an incredibly durable surface when properly applied. We’re talking about something that can last ten years or more with regular use. It becomes part of the wall itself, resistant to peeling or lifting at the edges. Heavy daily use won’t wear it down quickly.

Wallpaper lasts several years, though the lifespan varies by brand and usage. High-traffic areas where people write and erase constantly may show wear sooner than lightly used spaces.

For permanent installations where you expect heavy, long-term use, paint offers better longevity. Wallpaper works great for spaces where you might want to change things up in a few years anyway.

3. Surface Quality and Writing Experience

Quality whiteboard paint produces an exceptionally smooth, glass-like surface. Markers glide effortlessly, and erasing feels seamless. The glossy finish resists ghosting when maintained properly. 

Good wallpaper provides a smooth writing experience than paint. The surface might have a slightly different texture—some people prefer it, others notice the distinction.

Both work fine with standard dry erase markers, but if you’re particular about writing feel, testing samples before committing makes sense.

4. Cost Considerations

Initial costs differ significantly. Whiteboard paint is less costly. Whiteboard wallpaper costs more initially, particularly for smaller areas.

Paint’s longevity means you’re not replacing it anytime soon. Wallpaper might need replacement sooner, which could make paint more economical over a decade. Think about your timeline when calculating true costs.

5. Coverage and Customisation

Paint can cover any size or shape wall seamlessly. Corners, edges, unusual dimensions—paint handles them all without visible seams. You get a unified surface that looks integrated into the space.

Wallpaper comes in set widths, which means large walls may require multiple sheets. Seams between sheets are usually minimal but visible upon close inspection. Cutting around outlets or fixtures takes some careful measuring.

For whole-wall coverage or oddly shaped spaces, paint provides cleaner results. Wallpaper works beautifully for defined sections or smaller designated areas.

6. Maintenance and Upkeep

Both options require similar day-to-day maintenance—regular wiping with a dry eraser or damp cloth keeps them functioning well. Periodic deep cleaning with whiteboard cleaner helps prevent marker buildup.

The paint surface is tough and can handle more aggressive cleaning when needed. Wallpaper requires gentler treatment to avoid damaging the coating or causing edges to lift.

Neither option is high-maintenance, but paint edges ahead slightly for ease of care over many years.

7. Aesthetic Appeal

Paint creates a sleek, built-in look that feels like a permanent architectural feature. The glossy finish catches light attractively and signals quality. It suits professional environments and modern aesthetics particularly well.

Wallpaper can achieve a similar look but sometimes reads as more of an added element rather than an integrated feature. That said, this distinction matters more to some people than others. In most spaces, both options look perfectly professional and functional.

Choose whiteboard paint if you’re a homeowner planning to stay long-term, want maximum durability, don’t mind the installation process, and prefer a premium, permanent solution. It’s ideal for heavy-use environments like busy offices or frequently used home command centers.

Go with whiteboard wallpaper if you’re renting, want something up quickly, prefer the flexibility to change later, or are testing whether you’ll actually use a writable wall. It’s perfect for temporary setups, lower-traffic areas, or anyone who values easy installation and removal.

Key Takeaway

Creating a writable wall is simple. Whether you go with chalkboard paint, whiteboard paint, peel-and-stick wallpaper, or magnetic surfaces, each option offers a straightforward way to turn any wall into a functional workspace.

The real value shows up in daily use. Writable walls adapt to whatever you need—helping kids learn, keeping families organised, brainstorming work projects, or just capturing fleeting thoughts. They encourage different thinking, make collaboration easier, and keep important information visible.

If you’ve been considering one, there’s no reason to wait. Pick the method that suits your situation, invest a weekend, and see how it changes your space. Sometimes the simplest additions make the biggest difference in how we live and work.


[siteorigin_widget class=”WP_Widget_Custom_HTML”][/siteorigin_widget]
Smarter Surfaces
Privacy Overview

This website uses cookies so that we can provide you with the best user experience possible. Cookie information is stored in your browser and performs functions such as recognising you when you return to our website and helping our team to understand which sections of the website you find most interesting and useful.