
- Introduction
- What is Silver Screen Paint?
- Evaluation Process For Best Silver Screen Paint For Projector
- Benefits of Best Silver Screen Paint for 3D Projection
- Key Takeaway
- FAQs
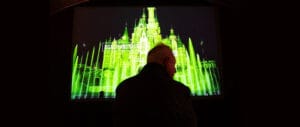
Creating the perfect home cinema experience has become increasingly popular amongst UK homeowners, with the best Silver Screen Paint for 3D Projection technology leading the charge. However, achieving professional-quality results requires more than just an expensive projector – the screen surface plays an equally crucial role. Silver screen projector paint has emerged as a game-changing solution, offering superior brightness and contrast compared to traditional white screens while maintaining excellent 3D performance.
What is Silver Screen Paint?
Silver screen paint contains microscopic metallic particles that reflect light more efficiently than conventional white surfaces. This technology dates back to early cinema houses, where silver-coated screens were standard. Modern formulations have refined this concept, creating paints specifically engineered for home projection systems.
Smarter Surfaces Silver Screen Projector Paint is a 3D projector paint that turns any wall or smooth surface into an ultimate 3D projection screen. Not just high-end home theatres, this specialised paint is ideal for commercial spaces like movie halls, museums, galleries, and event arenas as well.
What makes it stand out is its ability to reflect a remarkably high percentage of the projected light. This higher light reflection eliminates any loss in picture quality, even in environments with low to medium ambient light. As a result, you get brighter and cleaner images with high depth and clarity.
Our silver high-gain projector paint can be applied to any wall or smooth surface. You can even use it over old fabric screens to refurbish them. However, it’s not suitable for roll-up screens.
Now that we have a clear idea about the paint and what it does, here’s a lowdown on the key benefits that make it the best choice for high-definition 3D projection.
Evaluation Process For Best Silver Screen Paint For Projector

The ideal and best silver screen paint for a projector balances multiple factors: 3D performance, colour accuracy, viewing angle requirements, and budget considerations. This section will talk about selecting and applying silver screen paint effectively.
Step 1: Assess Your Room Conditions
Before selecting any silver projection paint for home theatre, thoroughly evaluate the viewing environment. Measure ambient light levels during typical viewing times. Silver screens perform well in controlled lighting but can appear overly bright in rooms with significant ambient light.
Consider the size of the room and the sitting position. Silver screens have good brightness but with limited viewing ranges compared to white screens. Make sure that all seating positions are inside the best viewing area (usually 45 degrees of the centre).
Document wall texture and condition. Silver screen paints require smooth, properly prepared surfaces for optimal performance. Textured walls may require additional preparation work.
Step 2: Determine Your Projector Compatibility
Not all projectors work equally well with silver screens. Check your projector’s specifications for light output (measured in lumens) and colour temperature. Silver screens with the best projector screen paint for 3D amplify brightness, so lower-lumen projectors often benefit significantly from the increased gain.
Verify 3D capability and polarisation method. Passive 3D systems using polarised glasses work exceptionally well with silver screens. Active 3D systems may not see the same benefits but still perform adequately.
Test colour accuracy if possible. Some users report that silver screens can introduce a slight cool colour cast. Modern formulations have largely addressed this issue, but testing remains advisable.
Step 3: Calculate Required Coverage Area
Measure your intended screen area precisely. Most silver screen paints cover approximately 15-20 square metres per litre, though coverage varies by surface texture and application method.
Consider screen shape requirements. Standard rectangular screens are straightforward, but curved or custom shapes may require additional planning and masking techniques.
Step 4: Research Available Products
Several providers produce quality 3D projector screens but for paint there are only a small number technically capable of producing paint for 3D. For example, Smarter Surfaces is known for what is arguably the best silver screen paint for projector specifically targets 3D projection applications.
The formulation includes advanced metallic particles designed to preserve polarisation whilst minimising hot-spotting. Their silver variants provide excellent 3D performance with good colour accuracy.
Step 5: Evaluate Gain Specifications
Screen gain measures how much light the surface reflects compared to a standard white screen. Silver screen paints typically offer gains between 1.2 and 2.8.
Higher gain values provide brighter images but create narrower viewing angles and potential hot-spotting (bright spots visible from certain angles). For most home applications, gains between 1.4 and 1.8 provide the best balance.
Consider your projector’s brightness when selecting gain. Dim projectors benefit from higher gains, whilst very bright projectors may require lower gains to avoid overwhelming the image.
Step 6: Plan Surface Preparation
Proper surface preparation determines final quality more than paint choice. Start with a completely clean, smooth wall surface.
Fill any holes, cracks, or imperfections with appropriate filler. Sand smooth once dry. Even minor surface irregularities become magnified when projected upon.
Apply a high-quality primer designed for the specific paint system. Many silver screen paints require specific primers to achieve optimal performance and adhesion.
Allow adequate drying time between preparation steps. Rushing this process often leads to disappointing results that require complete re-application.
Step 7: Select Application Method
Best Silver Screen Paint for 3D projection can be applied using brushes, rollers, or spray systems. Each method offers distinct advantages and challenges.
Brush application provides excellent control but may leave texture marks. Use high-quality synthetic brushes designed for water-based paints.
Roller application covers large areas quickly and evenly. Choose rollers with minimal texture – foam rollers often work well for silver screen paints.
Spray application delivers the smoothest finish but requires proper equipment and technique. Consider a professional application for spray methods unless experienced with spray painting.
Step 8: Execute Proper Application Technique
Begin application during optimal environmental conditions – low humidity, moderate temperatures, and minimal air movement.
Apply thin, even coats rather than attempting to achieve full coverage in one pass. Most silver screen paints require 2-3 coats for optimal performance.
Maintain wet edges to avoid lap marks. Work systematically across the surface without stopping mid-section.
Ensure a commercial paint sprayer is used that atomises the paint, small handheld DIY paint sprayers are not suitable.
Allow proper drying time between coats as specified by manufacturer’s instructions. Inadequate drying can cause adhesion problems and uneven appearance.
Step 9: Quality Control and Testing
Inspect the finished surface under proper lighting before projector testing. Look for streaks, uneven coverage, or texture issues that may affect projection quality.
Set up your projector and test with various content types. Check 3D performance specifically, looking for ghosting or reduced stereoscopic effect.
Evaluate colour accuracy using test patterns or familiar content. Make note of any colour shifts that may require projector adjustment.
Test viewing angles from all seating positions. Ensure acceptable image quality throughout your intended viewing area.
Step 10: Final Adjustments and Optimisation
Adjust the projector as per your silver screen. This can involve brightness, contrast and colour temperature.
Include lighting adjustments in the rooms to optimise the performance of the screens. Perceived image quality can be substantially enhanced even by small reduction of ambient light.
Record your settings and paint specifications in case you will need them in the future. This data is useful in maintenance or troubleshooting.
Benefits of Best Silver Screen Paint for 3D Projection

The benefits of silver screen paint below make 3D projection screen paint an attractive option for home cinema enthusiasts, particularly those prioritising 3D content and maximum image quality within their specific viewing environment.
Enhanced Brightness and Image Quality
Silver screen projector paint increases picture brightness as compared to standard white screens. Light is reflected more efficiently by the metallic particles. This makes it suitable for spaces with some ambient lighting or with projectors of lower lumen output.
Superior 3D Performance
The primary advantage of 3D projection is that the paint maintains light polarisation. Traditional white screens tend to depolarise light from 3D projectors, resulting in ghosting and reduced stereoscopic quality. Silver screens preserve the polarised light that is required to produce clear, sharp 3D images with minimal crosstalk between left and right eye images.
Improved Contrast Ratios
Silver screen paint enhances contrast by reflecting more light to viewers while maintaining deep blacks. This creates more vivid, punchy images with better definition between light and dark areas. The increased contrast is particularly noticeable in darker viewing environments.
Cost-Effective Solution
Compared to purchasing a large commercial projection screen, silver screen paint offers excellent value. A typical application costs a fraction of what a quality-manufactured screen would cost, often delivering comparable or superior performance for the specific viewing environment.
Customisable Screen Sizes
Paint allows for completely custom screen dimensions and shapes. Whether creating an ultra-wide cinema format, curved screen, or unusual aspect ratio, paint adapts to any surface configuration. This flexibility is impossible with pre-manufactured screens.
Seamless Integration
Smarter Surfaces best projector screen paint for 3D, when used correctly, forms a flush, built-in look that does not stick out of the wall. This gives it a cleaner look than mounted screens, especially in multi-purpose rooms or areas where the screen may not be used all the time.
Reduced Hotspotting
Quality silver screen paints are formulated to minimise hotspotting – bright spots that can appear with high-gain surfaces. Modern formulations distribute light more evenly across the viewing area compared to older silver screen technologies.
Long-Term Durability
When properly used, the Best Silver Screen Paint for 3D projection can last for 5-10 years with minimal maintenance. Compared to fabric screens that will sag, wrinkle, or get dirty, painted surfaces remain always flat and are simpler to clean as desired.
Space Efficiency
Paint eliminates the need for screen mounting hardware, motorised systems, or storage space for retractable screens. This is particularly beneficial in smaller rooms where every centimetre counts.
Professional Results at Home
Silver screen paint can deliver cinema-quality results in domestic settings, particularly when combined with appropriate room design and lighting control. Many commercial cinemas historically used silver screens for their superior performance characteristics.
Key Takeaway
The ideal and the best Silver Screen Paint for 3D projection balances multiple factors: 3D performance, colour accuracy, viewing angle requirements, and budget considerations. Premium products justify their cost through superior performance and longevity, whilst budget options can still deliver satisfactory results for less critical applications.
The best silver screen paint is the one that works optimally with your specific equipment and room conditions. Take time to research thoroughly, prepare properly, and apply carefully – the results will reward your patience with years of exceptional 3D projection performance.
